This test is for the TI (tranisistorised ignition) model bikes, which is the GL500 range, all 650s and some later CX500s.
If you’re looking for the CDI test, click here.
Before we begin – this test should be done twice, once with the engine cold and once at operating temperature as a stator can be perfectly functional when cold but show up a fault as components heat up and expand. To begin the test, grab a multimeter.

Doesn’t have to be an expensive one. Make sure it’s got batteries in it. To begin with, we’ll test the leads to make sure there’s not extra resistance there that will throw off our readings. Power on the multimeter and set it to the lowest Ohm setting:
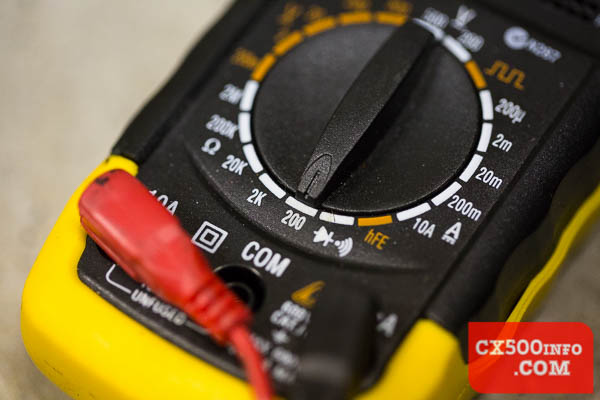
On this one it’s 200. Now touch the two leads together and make sure that the figure reads zero:

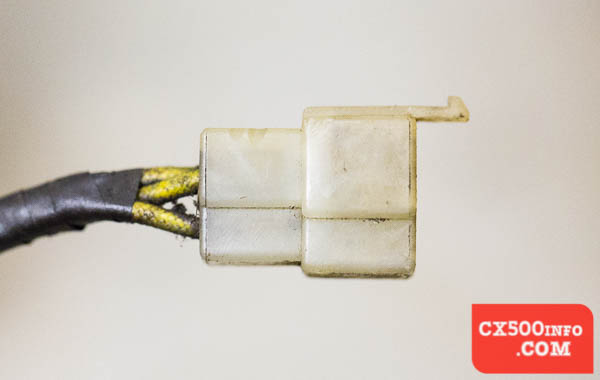
If the figure reads anything above zero, you can subtract that number from the results you get from your stator as it’s a falsely high reading. Also, if it’s a large number you’ll want to look into why your leads have resistance – are they dirty or damaged? Next up, locate the required cables – probably underneath your seat/side cover area. The cables you want should look like the below shots, though they may be cleaner or dirtier. We want the connector with three yellow wires going into it:
From the front:
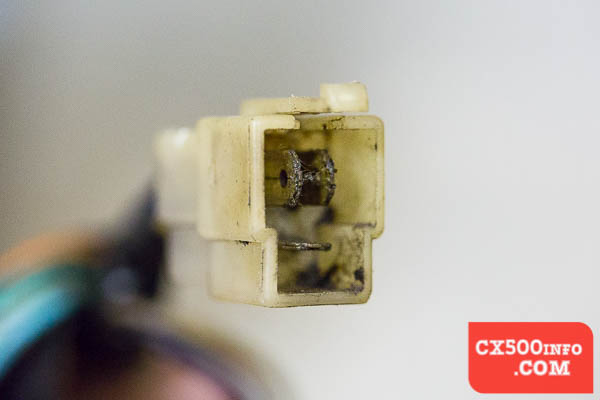
If you have crusty looking connectors, now is a really good time to clean them with some contact cleaner, a small wire brush or whatever you please – additional crud on the metal can give you readings which are off. The connectors pictured in this tutorial have more crud on them than I would be happy testing, FYI.
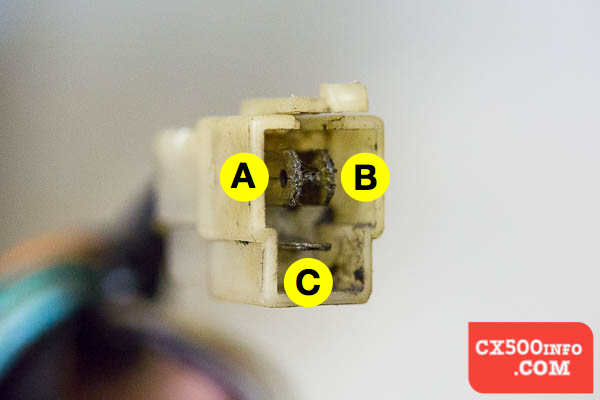
Set your multimeter to it’s lowest Ohm setting:
and check pins:
- A/B
- B/C
- C/A
There should be below a single ohm (1) of resistance. If there’s anything above 1.5 ohms after taking into account lead resistance (if any) there is likely a fault in the stator coils or the wires coming from them. Now set your multimeter to “continuity” (pic pending). Find a ground point on your frame – not the tappet covers – and check:
- A/ground
- B/ground
- C/ground
Each of these should be infinitely resistant – there should NOT be any kind of connectivity between these coils and the ground (also known as the earth). If there is you will need to replace your stator. There’s one more test we can do with these three wires. Start the bike, leaving just the connector with the three yellow wires unplugged. Set your multimeter to a range that is at least 100V: *pic coming* Set the bike RPM to about 2000 with the throttle (can be handy to have a second set of hands), and measure the voltage between the pins:
- A/B
- B/C
- C/A
The results should usually be between 40 and 70 volts. The exact voltage figure should ideally be in that range but that is not as important as consistent results here; if they’re more than 5-10% apart it’s likely that you have a faulty stator. Now you should have a solid idea of whether your stator is OK or not – and don’t forget to do this test with both a hot and cold engine.