Tom John from Purpose Built Moto has sent in this article on how to install rearsets on a Honda CX500 motorcycle.
Why rearsets? Rearset pegs are a staple modification for anyone serious about making their café racer or brat build function properly with altered handlebars. When moving the bars down to clip ons, the standard foot peg position will generally have you folded over like a half opened pocket knife – resulting in rider pain and lessened control over the bike. Shifting the foot position rearwards compared to stock results in better ergonomics for the rider, thus better control and longer rides with less discomfort.
With most bikes, moving to rearsets is not all that difficult – usually requiring nothing more complex than a new peg mount and extending the shift and brake linkages. As you will see below, Tom had to go to a great deal more effort than that to achieve the same result on a CX! Why? It all comes down to the orientation of the motor in relation to the frame – and in the the crank runs longitudinally rather than crossways. Because of this difference you have to transfer the a forward/backward movement into up/down:
You will need to be able to weld and either own a lathe or know someone with one. Here’s the tools that you’re going to need to mount these rearsets on your CX500:
- General hand tools
- Grinder
- Electric drill
- TIG or MIG welder
- Lathe
The materials:
- 4 x 6mm eye bar ends
- 14mm round bar stock
- 20mm round bar stock
- 12mm Aluminium rod 200mm
- M6 + M8 Fasteners
- 6mm Mild steel plate 40mm x 50mm
On the brake side of things, Tom’s Signature series CX500 (build link here) utilised a linkage mechanism to operate the rear drum. On the build we’re looking at today he’s using a cable operated conversion that will be a little simpler to make than the first approach.
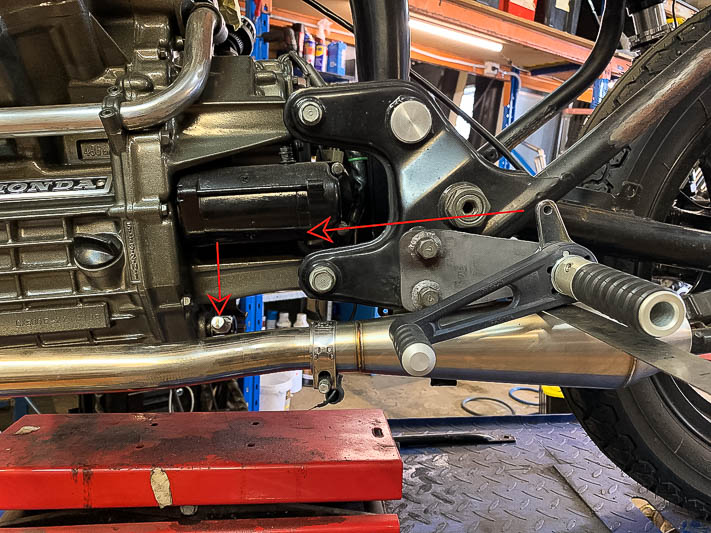
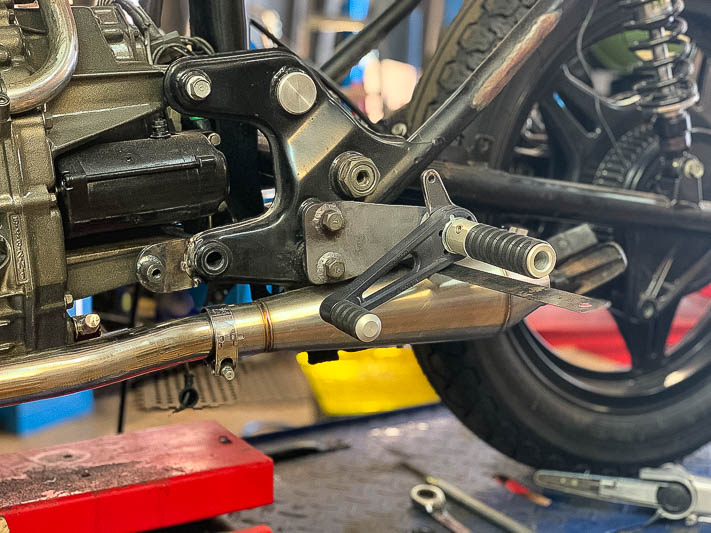
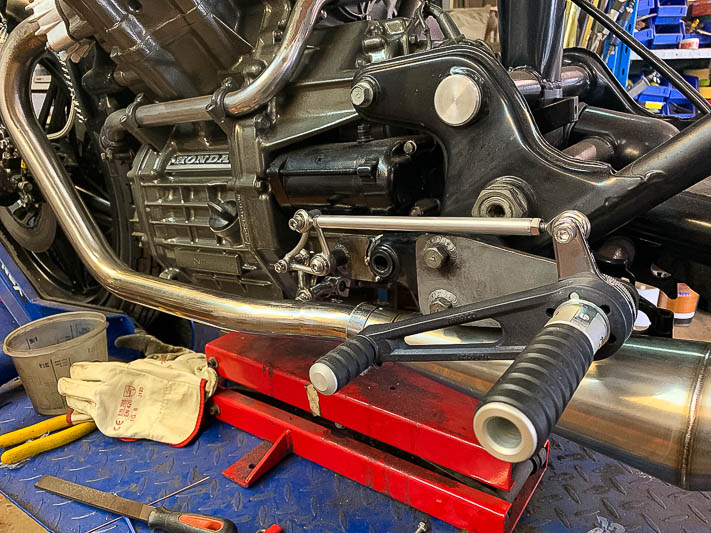
While Tom outlines the process of making the linkages below, the rearset positioning is left up to the reader – the positioning is going to vary a great deal depending on your preferred riding posture, handlebar setup and physical size. On Tom’s build, with a brat-style seat and clip ons, he chose a foot peg position which mounts 70mm rear of the swing arm pivot. He used Tarrozzi universal rearsets and welded in a threaded bung to one of the unused footpeg mounting holes.
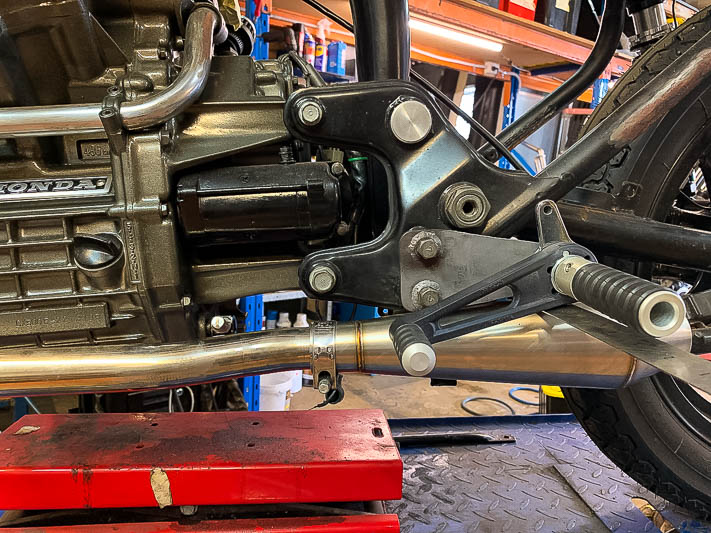
Once you’ve chosen your footpeg mounts and got them mocked up, it’s time to take a look at linking the left one to the splined shift shaft.
Tom cut the factory shift lever off, leaving a little tab to weld to later. After that he needed to make a mount point for the 90 deg linkage arm. In the past he has tapped a small hole in the head of the mount bolt, but he found that this way made it a little difficult to then reach forward again to the shift spigot. The method used here is a lot easier than that and has it lining up perfectly.
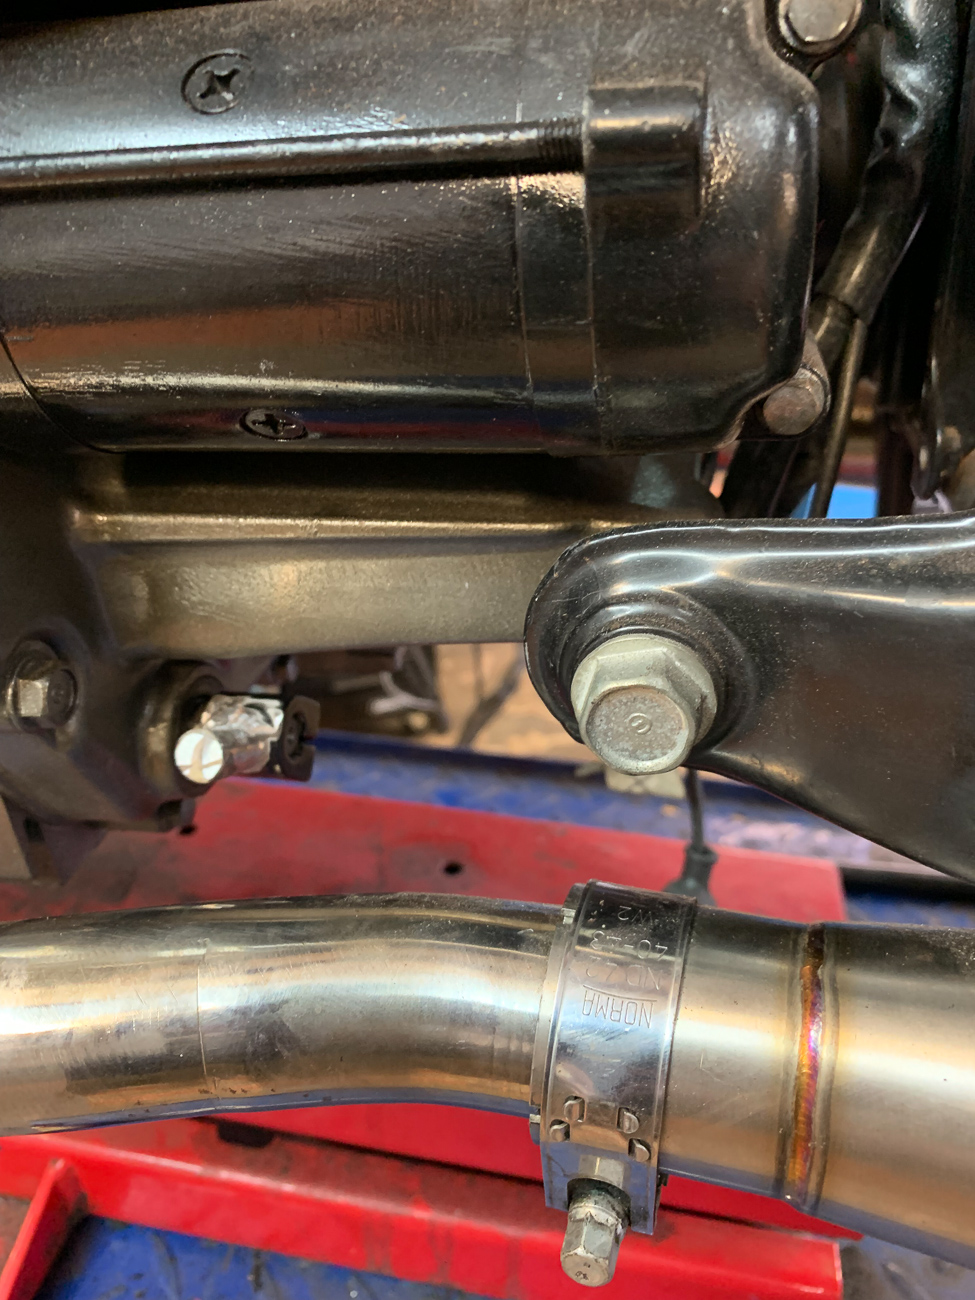
He cut a piece of flat plate 40mm x 50mm and radiused both ends as shown. One end gets welded to the frame, the other is just rounded to look nice.
From the measurements he took if you go much longer than 50mm on this mounting piece it may get in the way when trying to remove the motor from the frame, play it safe and stick to 50mm.
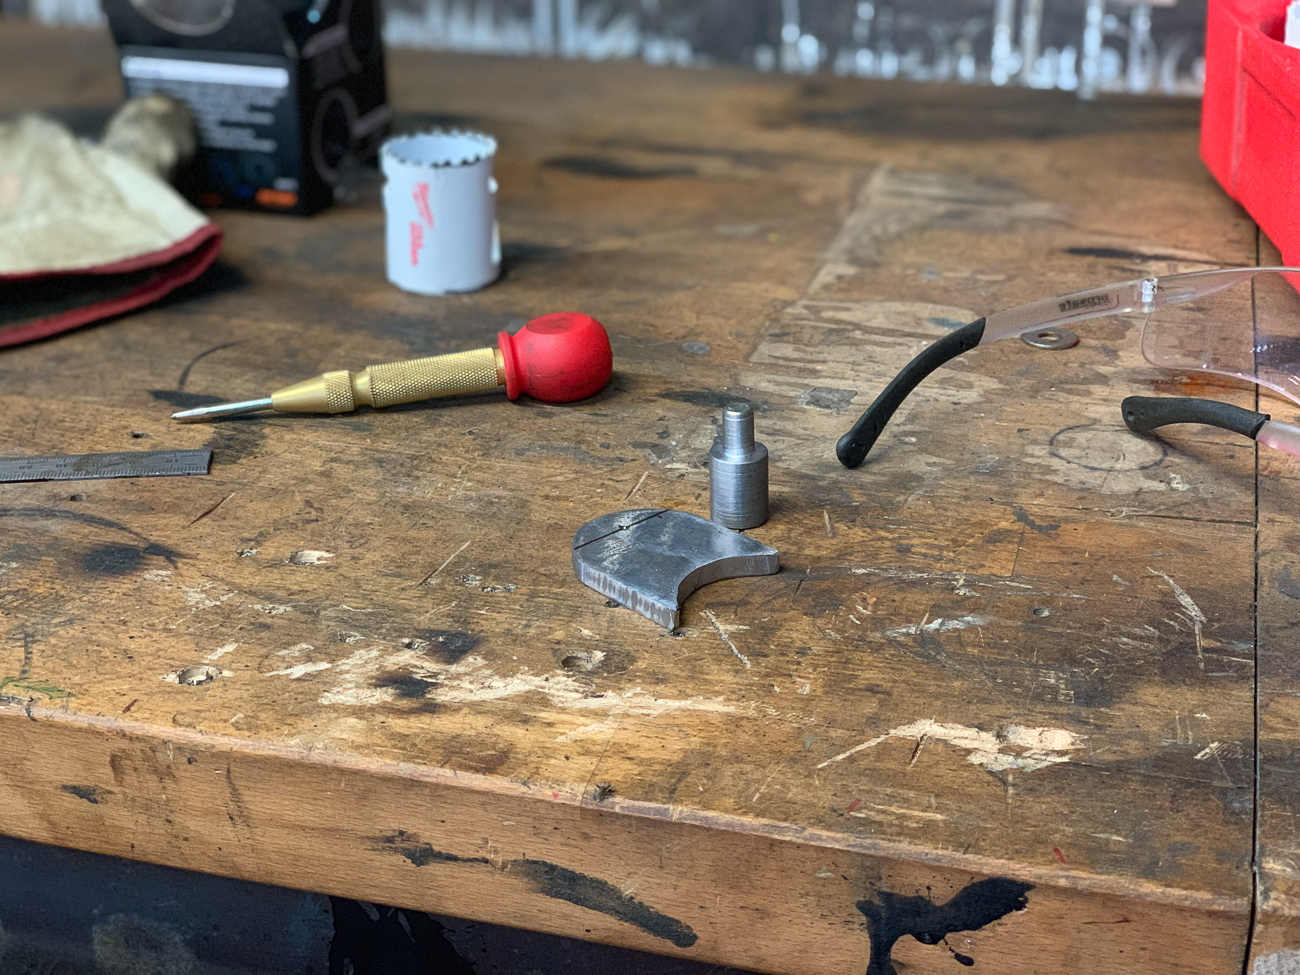
Once that’s cut and smoothed out he made a 20mm offset threaded bung to weld onto the plate – 14mm OD with an M8 thread in it.
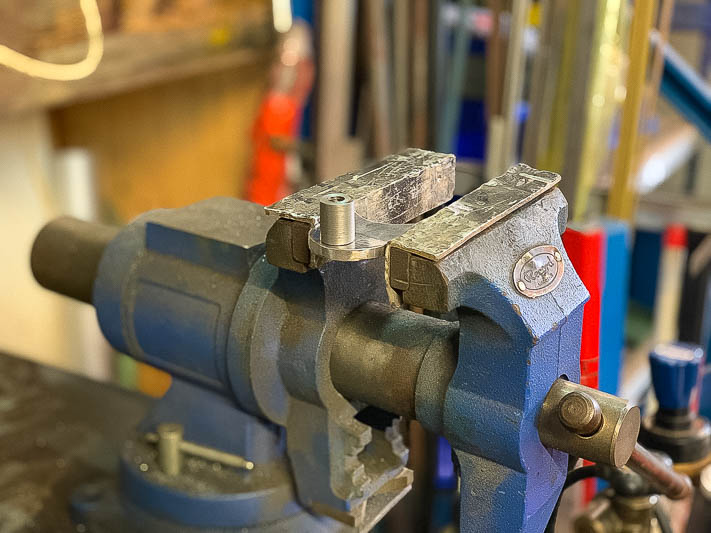
Weld that to the center of the flat plate then remove the paint from the lower engine bolt mount area of the frame. In this picture it has just been tacked because the engine had not yet been removed – it was welded properly later.
Time to fabricate the 90 deg arm for this CX500 rearset peg. Its important to note that if you make these arms too short or long, or make them un-even it can affect the way your foot shift operates and feels. Worst case scenario is that you end up either moving too far or not enough to shift the gear. To keep the ratios to same, he measured the distance from the center of the pivot point on the footpeg to the center of the linkage bolt hole. It’s 50mm, so the 90° linkage arm will also be 50mm on each side. Tom decided to make this linkage arm a bit of a feature, you may choose to go make it a little less pretty.

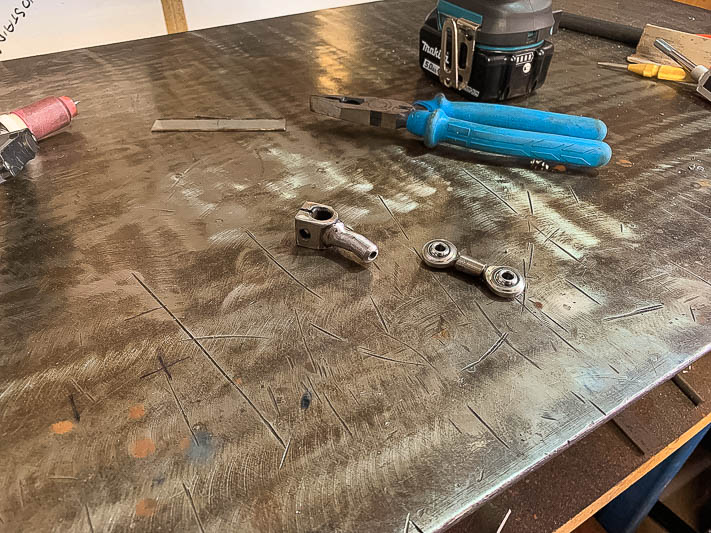
For this youll need:
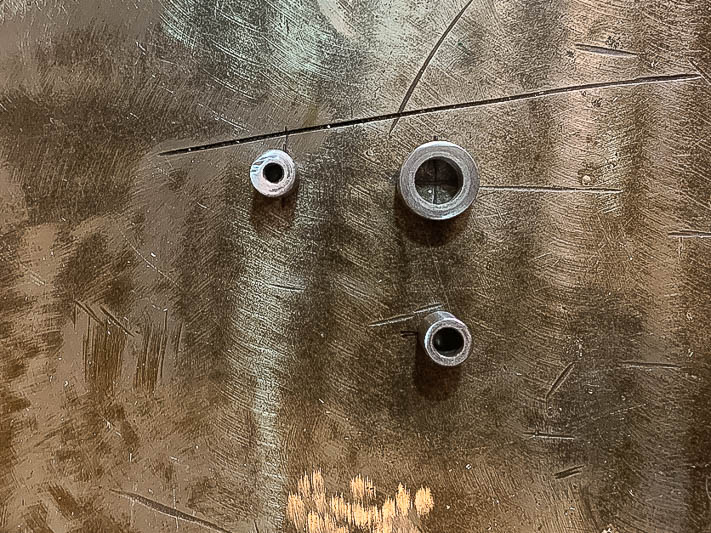
- 1x central pivot point, 12mm hole
- 1 x pivot bushing, 8mm hole
- 1 x linkage arm mounts, 6mm hole
- 1 x linkage arm mounts, 6mm thread
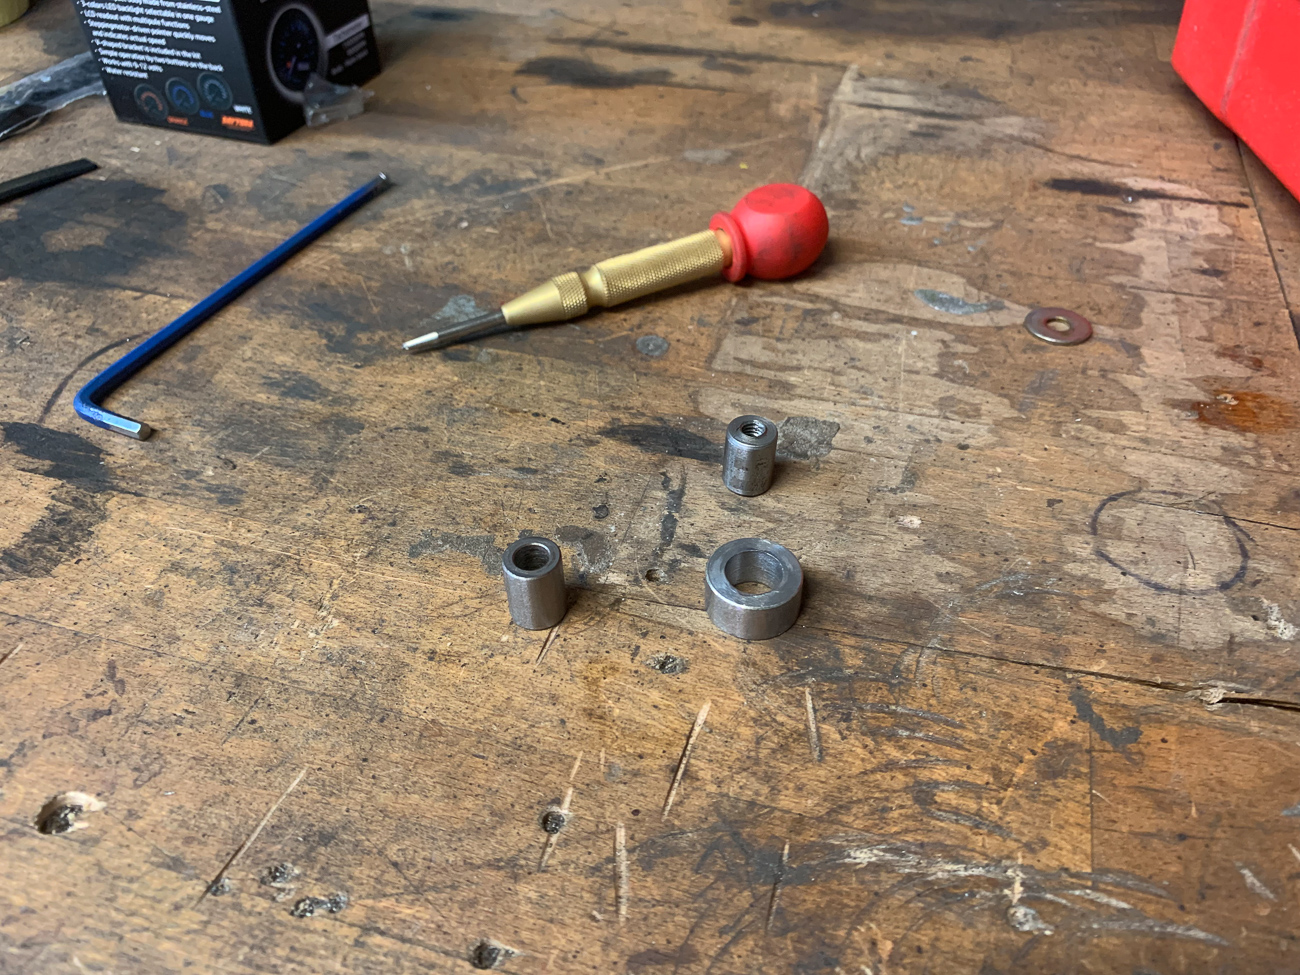
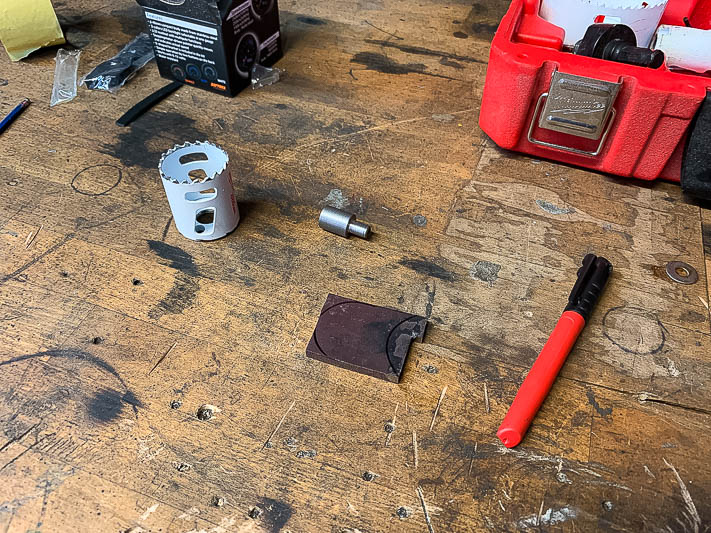
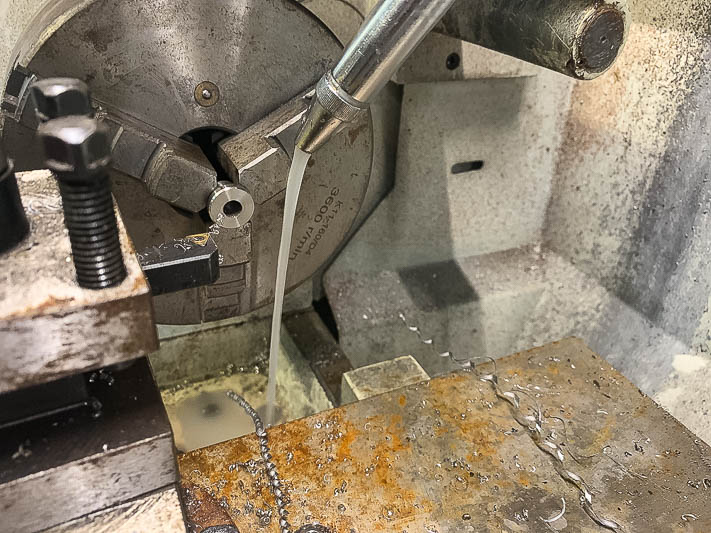
On the pivot point Tom turned down a bit of stainless steel on a lathe to 20mm OD with a 13mm hole, then made a pivot bushing of 13mm OD with an 8mm hole and a step on the top to hold the pivot point in place. The measurements aren’t critical but the fit is, make sure the two pieces can move freely when together and have minimal movement side to side. The two linkage mount point are 10mm OD, one with a 6mm hole and the other with a 6mm thread approximately 15mm in height.
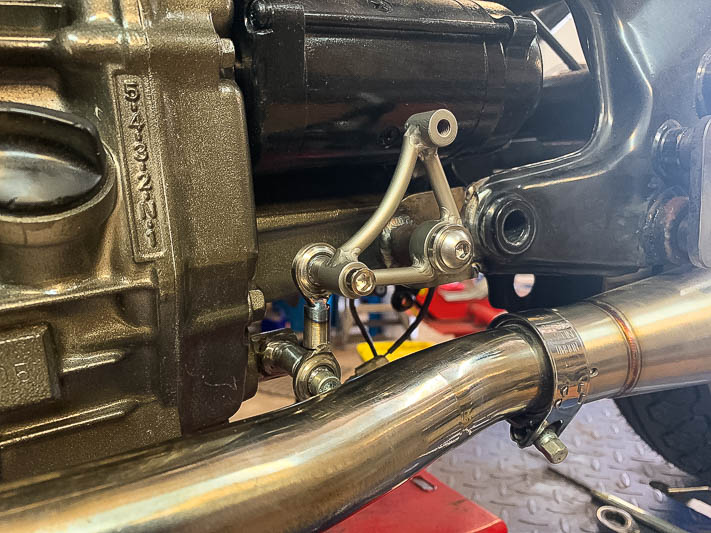
Mark on a bench the centre point, and measure 50mm either side at a 90° angle:
…then set the pivot point and 2 linkage mounts on the mark and link them up – in this case using a TIG welder. Tom used some stainless steel 6mm rod that he had and shaped it up so it looks pretty.
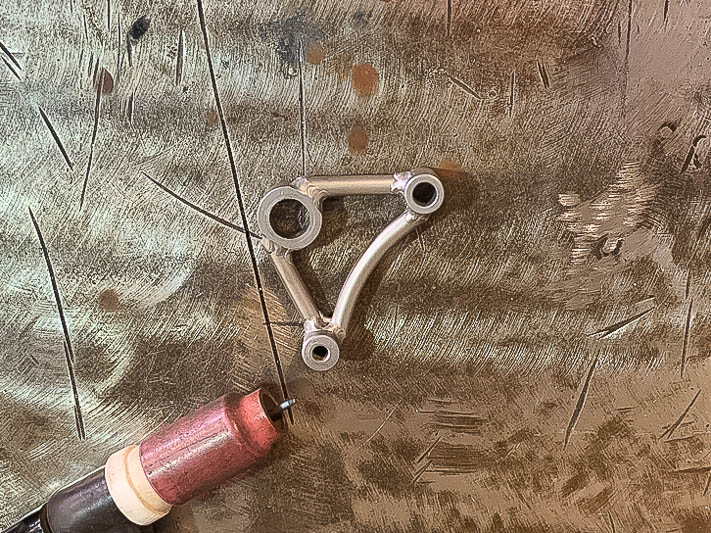
Once the 90 deg arm is finished, mount it up and you’re ready to link it to the gearbox.
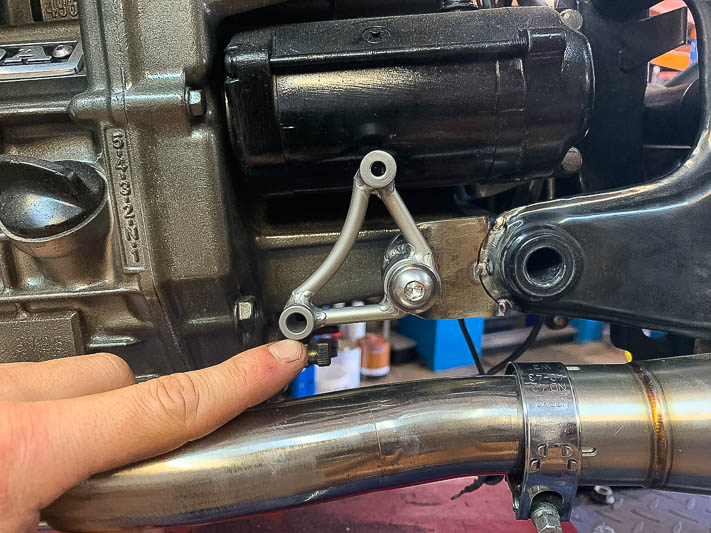
With the 90 deg arm in place and the shifter fitting mounted he took some measurements to extend the shift fitting. Tom welded a short 12mm round bar onto the factory shifter fitting so that he could then tap a 6mm thread into it.

Once that’s done it was just a matter of making a small linkage arm using two of the 6mm eye bar ends and a short 30mm extension piece. This can be welded up as the adjustment will be gained in the second linkage rod.
The eye bar ends are critical here to allow movement. The shifter pivots to operate, which means it operates on a radius – moving up and down in a circular motion. If you directly link the shifter to the arm it will lock up and not move.
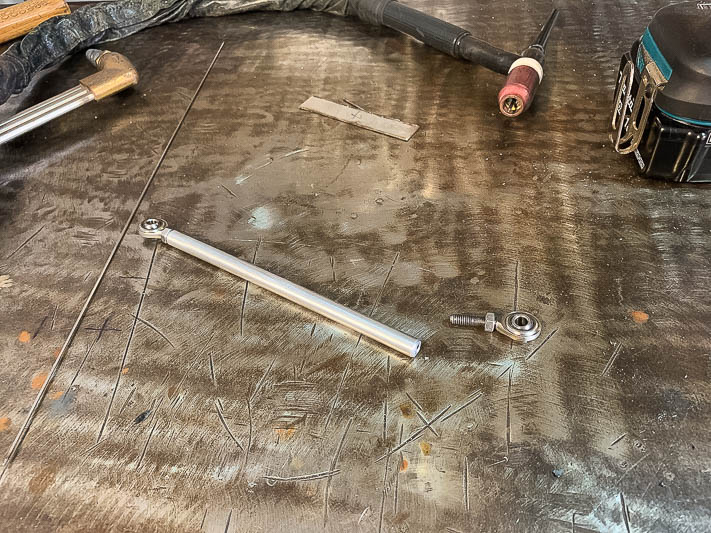
Mock up the shift linkage and set the footpeg at the angle you want it. Once you have done that you can now measure and fabricate the final linkage arm using the two remaining 6mm eye bar ends, cut the aluminium rod to length, tap the threads in each and screw the bar ends in with a lock nut on each end. You can then adjust the length to perfectly suit your foot position.

Once that’s in place, you can sit back and survey all that you have accomplished.
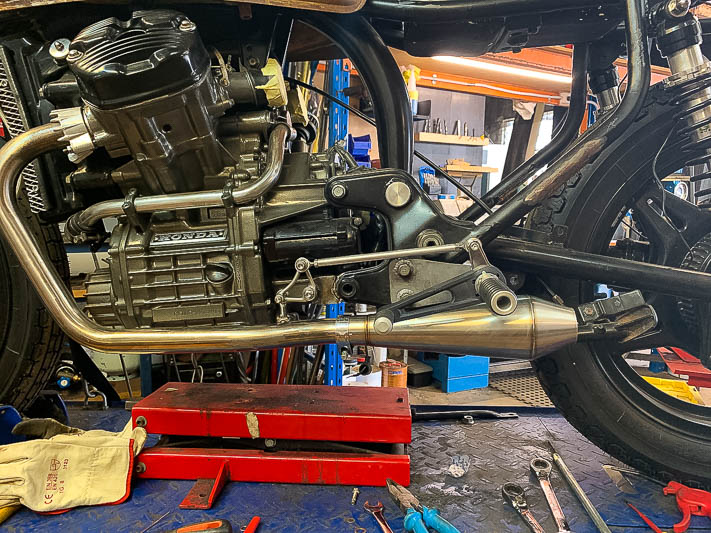
Tom also recommends at this point sitting on the bike and making some engine noises with your mouth, testing that the shift linkage operates as it should. If that works, you’ve done it right!
Thanks Tom – if you like his write-up check out his website at Purpose Built Moto.