Before using this site please read the site disclaimer. Also please note that any links provided may be part of an affiliate programme (viz. eBay, Amazon) which helps support the site as I will earn a commission when visitors make a qualifying purchase.
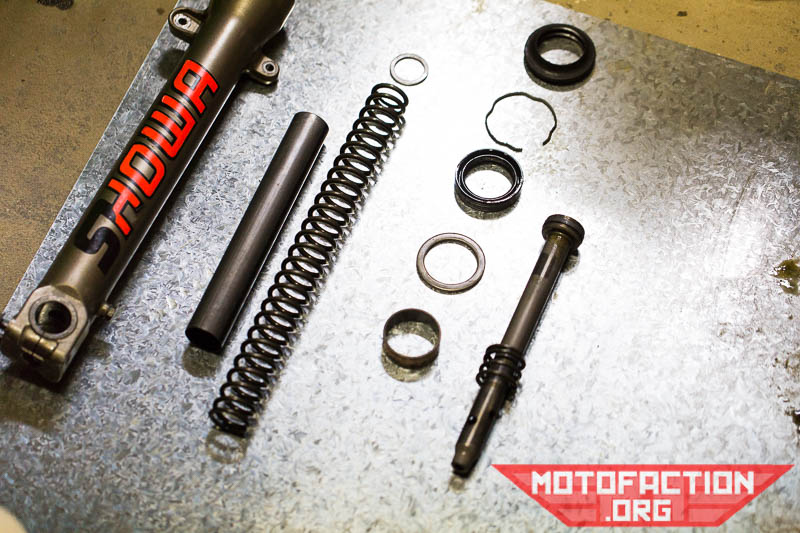
So now you have these components out of the fork:
First off take a look at the fork spring (part number 51401-KY1-003). On the MC19 it was 303mm long from the factory; measure it in it's relaxed state. The service limit for this spring is 297mm - if it's below that it needs to be replaced.

We can't find a specification for the other little spring (51411-463-003) which sits around the damper rod;
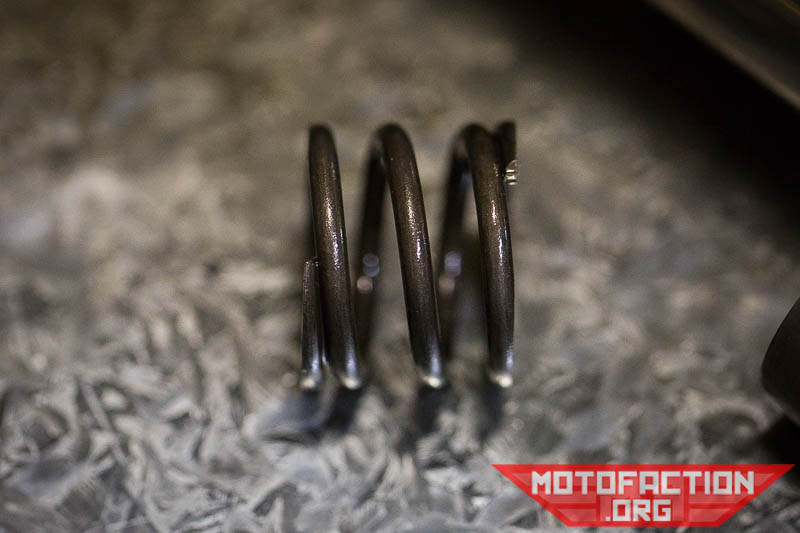
If you know of one get in touch! The spacer is 200mm long (part number 51402-ML7-691, Partzilla):
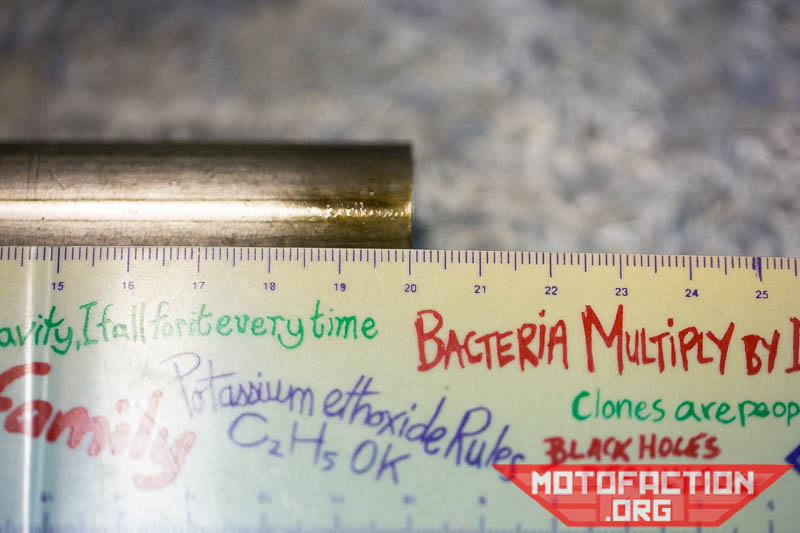
This shouldn't change through use but someone may have replaced it with an alternative. The damper rod (51440-KY1-003) should have a plastic ring around the top (51437-ML7-691, Partzilla):

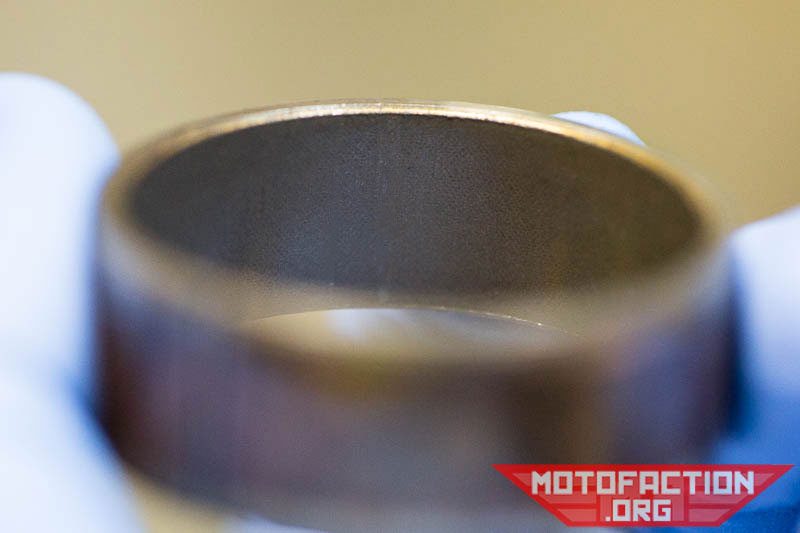
The guide bushing (51414-MN4-003, eBay AU) - the one which slides off the chrome fork stanchion and has a coppery outer part - has it's sliding surface on the inside, the outer part will probably look something like this:
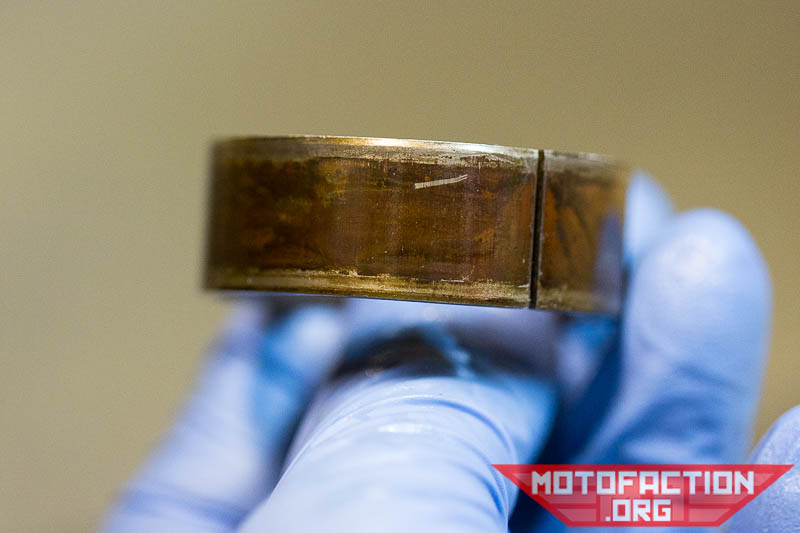
The inside, however, should be smooth and grey - this is the sliding surface and if you can see wear marks that expose the underlying copper colour around the inside you should replace it. This one we are re-using as it's in very good condition:
The bushing that is still attached to the fork leg (51415-MN4-003, eBay AU) also requires inspection:
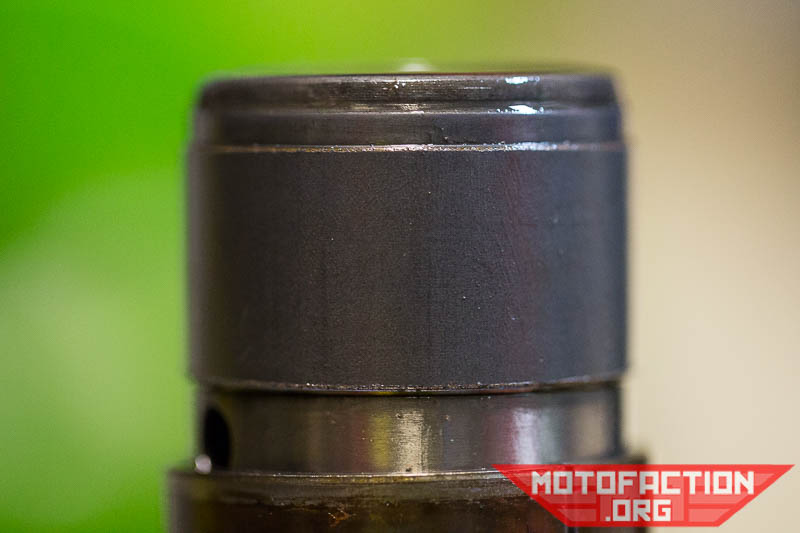
Same story - if you can see that it has worn through the grey outer coating you need to replace it. The 8mm bolt at the very bottom of the forks (part number 90116-KV3-701) has an 8mm x 13mm x 1.35mm copper washer (90544-283-000, eBay AU or your local Honda dealer) that probably needs to be replaced - it's a crush washer and for the small cost of acquiring one you might save yourself a leak down the track. The fork oil drain bolt (6x8mm bolt, part number 92000-06008-0A) also has a copper washer (90543-273-000, eBay AU or your local Honda dealer) that's worth replacing if you undo that bolt.
Check the snap ring for rust and corrosion and clean it up:
Check your chrome fork stanchions for corrosion and pits. If they are in the swept area of the fork oil seal they will catch and tear the seal, resulting in fork oil leakage and you having to do this job all over again so it's in your interests to fix this sort of thing:
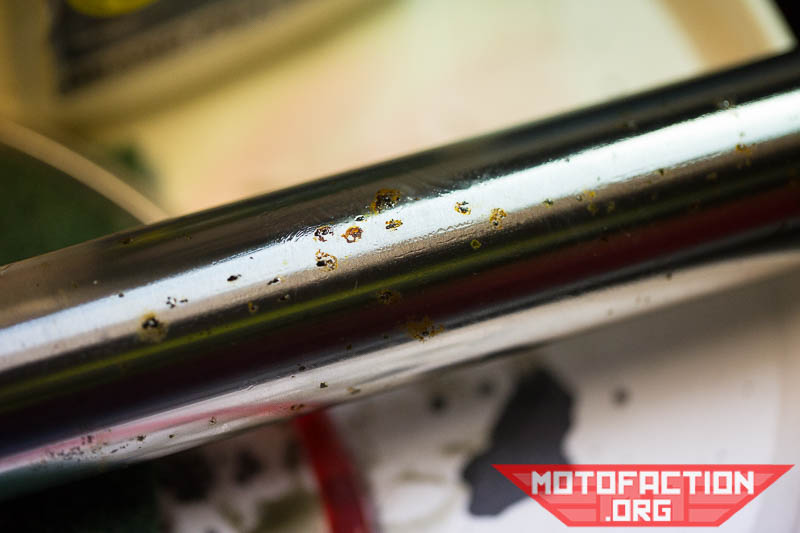
...before it causes you more headaches down the track. There are plenty of backyard fixes for this sort of thing but you should be able to get an idea of how bad it is by getting some fine (2000 grit or so) sandpaper or a Scotchbrite, soaking it in a bit of oil and rubbing the stanchion back to reveal just how good or bad things are:
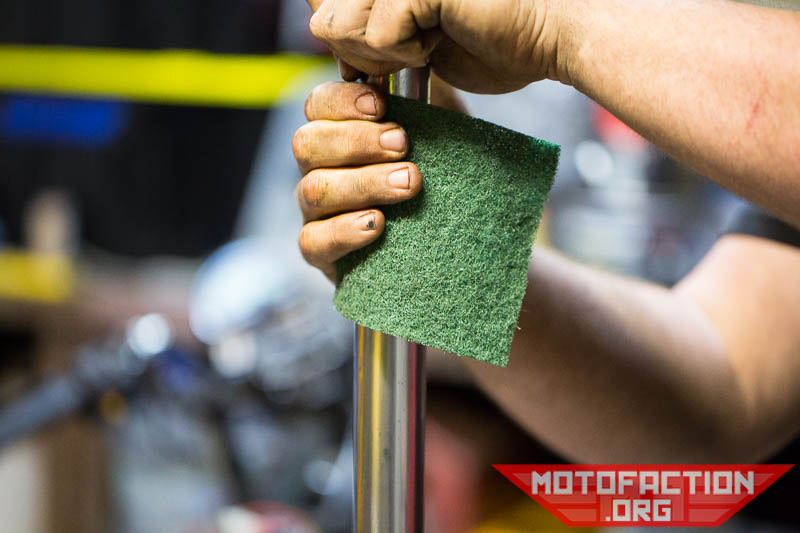
Techniques to fix this are beyond the scope of the current writeup but we'll do a separate article down the track on that. Keep in mind too that you have to slide the new fork oil seal down from the top of the fork so if there is a lot of bad corrosion in the way that you leave untouched you're likely to trash the new seal before it even sees service. Forks can be rechromed - RAD in Brisbane do them for about $150AUD/side last I checked - or you might be able to find some quality used ones.
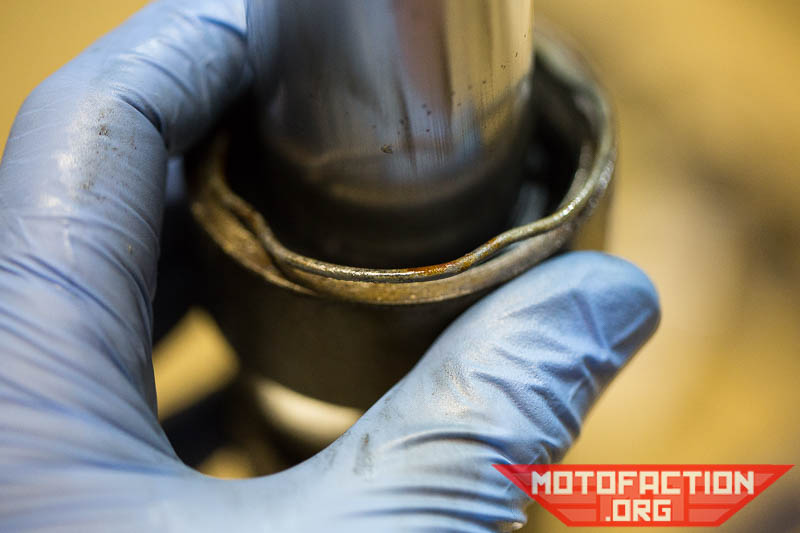
Check inside the fork lower for damage to the area where the seal sits;

It's not uncommon to find damage in this area from people slipping whilst trying to pry things loose - make sure there are no gashes that would prevent the fork seal from sealing and try to gently clean up as much corrosion and gunk from that area as possible. The fork caps need a little attention too:
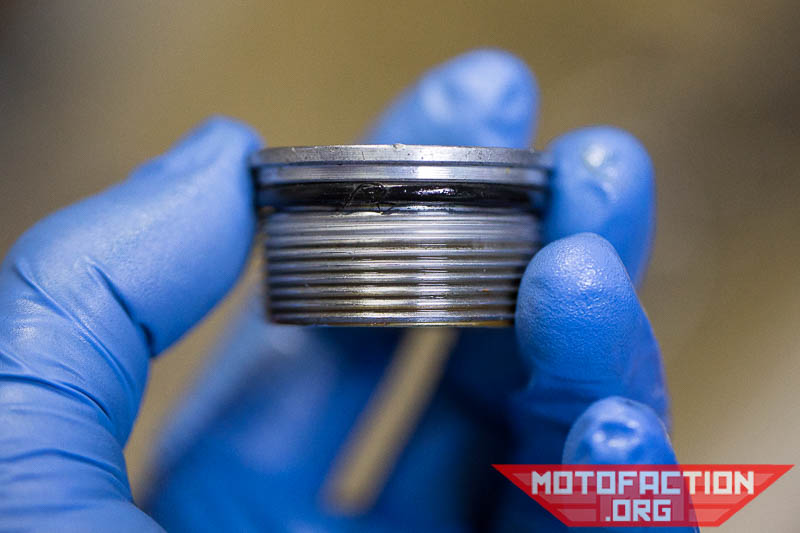
There's an O-ring there (30.2x2.4mm, part number 91356-MJ6-741, eBay AU or perhaps a generic O-ring kit) that may need replacing - remove it with a pick and roll it between your fingers. If it doesn't feel round in section or shows signs of the rubber deteroirating replace it.
Take a look at the dust seal:
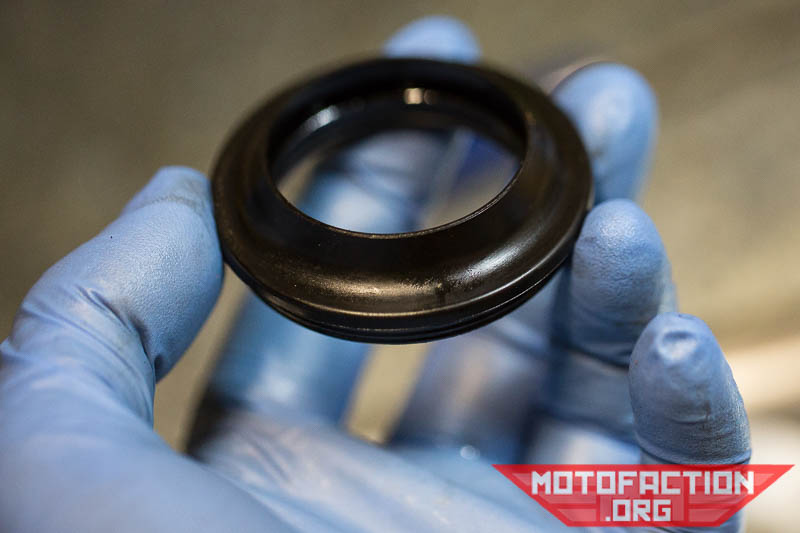
If it shows any signs of rubber damage or age (e.g. stiffness, cracking) it's worth replacing. These often come in a kit with an oil seal and aren't expensive so there's no harm in replacing it if you are uncertain about it's condition.
It's worth assessing the straightness of the forks while you have them off - the acceptable limit of deformation is 0.02mm. One way of doing this is to get a pair of V-blocks and measure any bend in the pipe with a dial gauge then halve the indicated value. If the result is greater than 0.02mm replace the chrome fork part. We will do a separate article on this technique later and link to it from here.
Take a look at the back up ring:
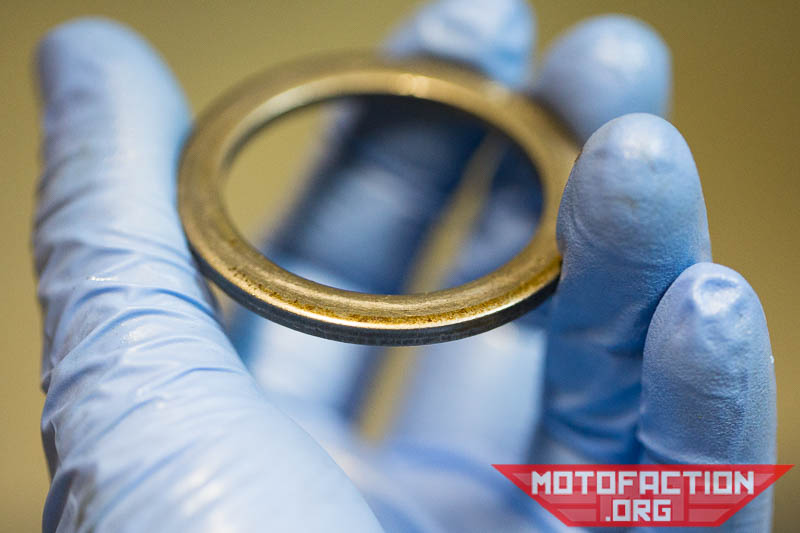
Make sure that it hasn't been worn into an oval shape and clean up any corrosion that's present.
In 2019 the server has had to double in capacity to support the growing site... please consider dropping the site a donation to help cover the costs! Check out our Patreon for support options, buy a shirt, buy our apps, use my NordVPN affiliate link to sign up to their service or donate via Paypal:
| Paypal $5 link ->> | |
| Paypal $10 link ->> |