CX
/ GL 500 / 650 Tachometer / Rev Counter Drive Cable Replacement
Skill
levels explained.
Skill Level : 2. Personally Dirty
: 1 : Work Mess : 2. Tools level : 1 : Space required : 1
Time : expert 30 minutes,
average 45 minutes, "first-time" 60 minutes.
All the hands, tools, and bike in
the photos are the author's.
All nut and bolt sizes are
quoted as the spanner size required to fit them.
I am very receptive to comments and
suggestions, but you use these pages entirely at your own risk.
If inside the headlight shell for
any reason, it's sound practice to unscrew both the speedometer and tachometer
drive cables from the underside of their instruments, and to drip some very
light oil down the inner cable run. This will prolong cable life.
The tachometer or rev counter drive
cable is particularly prone to breaking somewhere along its inner run, leaving
the rider with no engine speed display. The new drive cable is easily obtained
for about £10, but the problem lies in the removal and refitting, as the
engine end of the cable is extremely difficult to reach. The pattern tacho cables
are apparently not very long-lasting, so always use the genuine Honda ones.
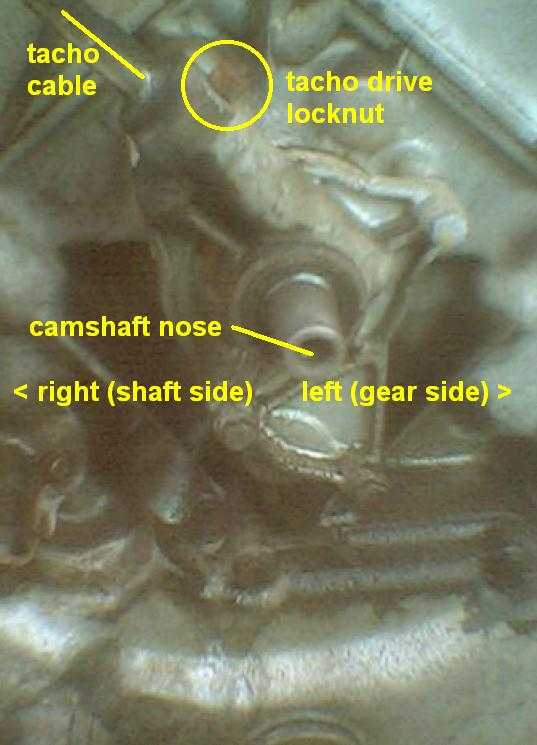 At
the front of the engine, at the base of the vee of the cylinders, and behind
the radiator and fan, lies a small aluminium housing (left). The nose of the
camshaft passes through an oil seal inside this casing and has a bevelled gear
drive which, via a sister bevel, drives a tongued spline. This in turn engages
with the engine end of the tacho cable, twisting it as the engine runs. The
inner run of the cable passes up to the tachometer and turns the dial, displaying
the engine speed.
At
the front of the engine, at the base of the vee of the cylinders, and behind
the radiator and fan, lies a small aluminium housing (left). The nose of the
camshaft passes through an oil seal inside this casing and has a bevelled gear
drive which, via a sister bevel, drives a tongued spline. This in turn engages
with the engine end of the tacho cable, twisting it as the engine runs. The
inner run of the cable passes up to the tachometer and turns the dial, displaying
the engine speed.
(In case you ever wondered why there
is a delay between starting the engine and the tacho doing anything, it's because
once the engine stops, the twist in the inner cable relaxes, and it takes several
seconds for the twist to work it way upwards as the engine starts.)
This housing is tucked right behind
the fan and radiator and is almost impossible to reach without removing these
two parts. That's the bad news - which explains why so many CXs run around with
dead rev counters, many owners putting off draining and removing the radiator
until something else necessitates it.
If you have an oil weep or stain
coming from behind the radiator, the camshaft nose seal has failed, and you
can easily change it once the radiator and fan are removed. In such a case,
you'll need a new seal and a new drive casing gasket.
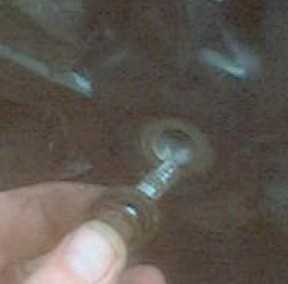
The engine end of the cable is retained
by a single locking bolt, with either a standard hexagonal head, or more possibly
an Allen (countersunk hexagonal) head. This is inserted from, as you view the
front, the two o'clock position, with the threads on the casing being at the
corresponding eight o'clock position.
If the previous owner of your CX
was savvy enough, he will have (a) used an Allen bolt as the retainer and (b)
inserted it from the 8 o'clock position, i.e. opposite to normal, and with the
screw threads engaged first. This is simply because, from the 8 o'clock position,
a long screwdriver or socket can just reach the retaining bolt
around the side of the radiator assembly.
So before you decide not to bother
changing the tacho cable, first remove the fuel tank. Then get a good quality
lamp and shine it upwards from just by the right hand side lower engine hanger
bolt, past the fan and radiator, and pick out the tacho drive assembly. It's
a roughly diamond-shaped piece sticking forward from the main engine casing,
immediately behind the fan. Now look at its lower edge, the one nearest to you.
Can you see the head of the retaining bolt? If so, you are lucky. Use a long
screwdriver or socket to withdraw the bolt, pull out the old cable, push in
the new one, push down and twiddle the handlebar end of the new cable's inner
run until you feel the tongue engage with the drive at the engine end, and once
you've taken the old cable off the tacho unit, you're home and dry. Replace
the retaining bolt, screw the handlebar end of the new cable to the tacho, and
that's it.
However, Sod's Law being what it
is, the retaining bolt has either frozen up in its hole, or is still inserted
form the 2 o'clock position. Unfortunately. this is the time to bite the bullet
and remove the radiator and fan, as you simply can't reach the retaining bolt
any other way.
The good news is that this is not
a difficult job. You will need a drain tub for the coolant, 12mm and 10mm ring
spanners, a crosshead or ordinary screwdriver, a torque wrench, new coolant,
and about 45 minutes of your time.
If you own a 650, you are even more
lucky, because you have an electric fan, and you don't need to rustle up a front
axle, which has exactly the right thread to pull off the mechanical fan. 500
Z, A, B, C, D owners - you will need to borrow your own or a pal's front axle,
unless your spares bin has a bolt of the same thread size.
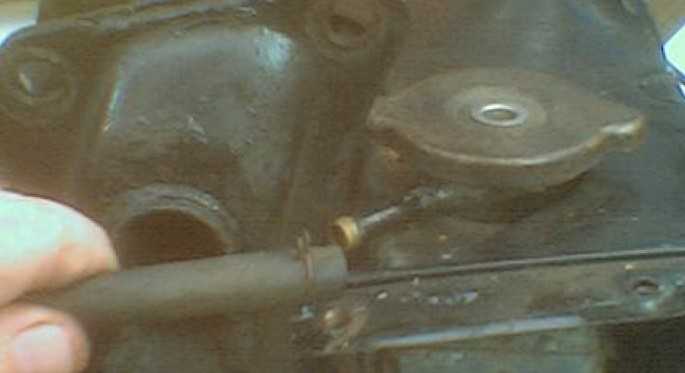 Ensuring
your engine is cold, remove the radiator cap and pull off the slim rubber overflow
pipe (left).
Ensuring
your engine is cold, remove the radiator cap and pull off the slim rubber overflow
pipe (left).
 Remove the radiator grille. On Zs, this is a complete one piece black plastic
shroud with a honeycomb grille. On most other bikes, remove the two bolts which
hold the bottom of the grille retaining plate and once this is off, the grille
drops out.
Remove the radiator grille. On Zs, this is a complete one piece black plastic
shroud with a honeycomb grille. On most other bikes, remove the two bolts which
hold the bottom of the grille retaining plate and once this is off, the grille
drops out.
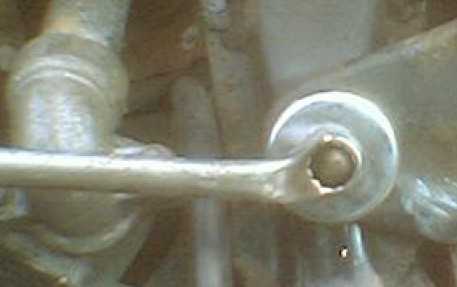
Now undo the 14mm plastic drain bolt
which is directly under the radiator, and drain the fluid into a clean plastic
receptable, about half a gallon capacity. Undo the top radiator hose (right),
at either the thermostat end (under the main spar) or the radiator end. The other
radiator hose is attached in an identical way but at the bottom of the opposite
side of the radiator, and when you slacken and pop off this hose, more coolant
will probably spill out.
The photo on the right shows the
engine removed from the frame, but these shots were taken when the engine was
out anyway. Don't worry, you don't need to remove your engine to do this job.
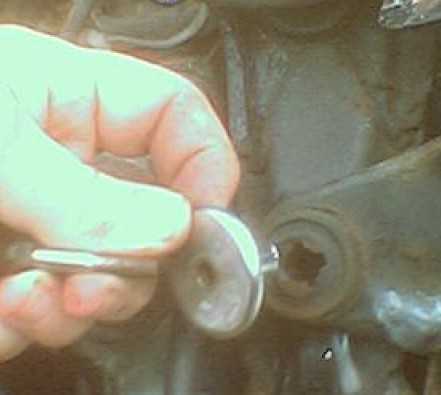
 Remove
the two 10mm chrome dome-headed nuts (left) which hold the radiator to the right
hand side of the engine hanger, and the single one on the left hanger.
Remove
the two 10mm chrome dome-headed nuts (left) which hold the radiator to the right
hand side of the engine hanger, and the single one on the left hanger.
If you have the Cx or GL variant
with the triple main top frame (Eurosport 500s and 650s, transistorised-ignition
GL500) the front engine mounts are split into left and right hand sides and
unbolting the right hand one gives you more room to work. I'm afraid you can't
do this with other models as they have a one-piece front engine hanger.
 The
chrome mushroom bolts pull out of their rubber mounts (right) and then the radiator
now pulls off forwards and to the left, ease it around the front brake lines.
Whilst it's off, it's a good idea to run fresh cold water from your garden hose
through it for a minute or two, from the bottom upwards, to reverse-flush out
any muck and accumulated debris.
The
chrome mushroom bolts pull out of their rubber mounts (right) and then the radiator
now pulls off forwards and to the left, ease it around the front brake lines.
Whilst it's off, it's a good idea to run fresh cold water from your garden hose
through it for a minute or two, from the bottom upwards, to reverse-flush out
any muck and accumulated debris.
I am not exactly sure how the electric
fans come away; I am guessing that they unbolt, disconnect and pull straight
off. Mechanical fans have a retaining bolt in the centre, which screws into
the nose of the camshaft; remove this with a 12mm ring or socket. It may help
to put the bike in top gear and apply the footbrake, to stop the engine turning
as you move the bolt.
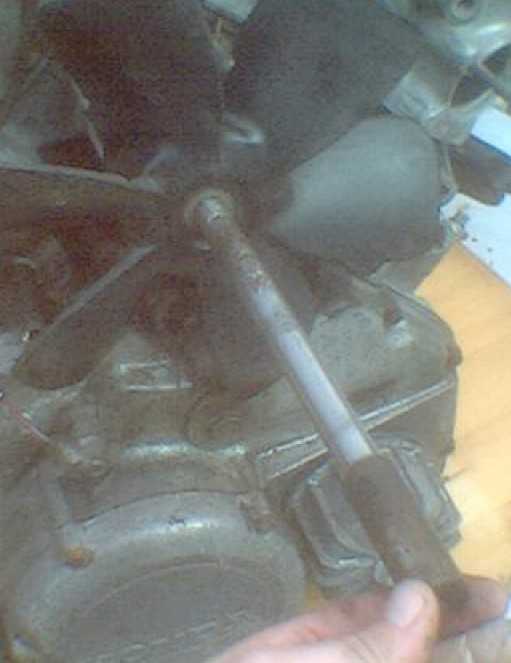
 With
the bolt out (left), screw in the front axle tightly to the fan's hub and tap
or wiggle it free.
With
the bolt out (left), screw in the front axle tightly to the fan's hub and tap
or wiggle it free.
500s have the mechanical fan which
is a push fit on the end of the camshaft (left). 650s have an electrical fan
triggered by a thermostat; this type comes off as one unit.
 Don't
give the mechanical fan hard knocks as the hub is soft aluminium. The fan can
be a tight fit, and one way to get it off is to knock a long thin wooden wedge
between the rear of the fan boss and the tacho casing, remove the wedge, move
it round 90 degress and repeat. This usually persuades a reluctant fan to part
from the camshaft.
Don't
give the mechanical fan hard knocks as the hub is soft aluminium. The fan can
be a tight fit, and one way to get it off is to knock a long thin wooden wedge
between the rear of the fan boss and the tacho casing, remove the wedge, move
it round 90 degress and repeat. This usually persuades a reluctant fan to part
from the camshaft.
If you have a previously unseen oil
weep from the housing area, or the seal here has done more than 20,000 miles,
buy a new camshaft nose oil seal and housing gasket, as this is a good time
to unbolt the tacho drive housing, and change them.
Remove the drive cable retaining
bolt , pull out the old cable and insert the new one, rotating the inner cable
until the drive slot is engaged. To check this, briefly spin the engine with
the kill switch set to "Off". If the handlebar end of the drive cable
rotates, the engine end is correctly engaged.
Now the clever part - reinsert the
retaining bolt from the opposite, 8 o'clock position, i.e. screw threads first.
Next time the tacho cable needs replacing, it will be a doddle!
Reassemble, using 15 ft lbs of torque
on the fan retaining bolt and no more than 9 ft lbs on the chrome radiator retaining
bolts. The plastic radiator drain bolt should be done just a little more than
finger tight. Too much spanner force and the bolt will shear off. DON'T use
a metal replacement bolt as this will react adversely with the antifreeze.
Note that there is a small steel
pipe, an oil passageway, connecting the bottom of the tacho housing to the front
engine casing. This should have a new o-ring fitted round it.
I suggest that you always change
the antifreeze as matter of routine. Use a 50/50 mixture of non-sillicate (Halford's
Advanced Formula) and distilled, or battery top-up, water. Nonsilicate antifreeze
greatly prolonges the life of your water pump, particularly the mechanical seal,
which are both at the other end of the camshaft. Fill the radiator to the top
at the cap, and once the engine has warmed and cooled again, top off at the
radiator and and fill the expansion bottle to the maximum mark.
Routing the tacho cable correctly
is important. It exits from behind the radiator assembly at the 10 o'clock position,
and then curves over the radiator top, into the headlight area, through an inverted
U-shaped clip, and then vertically towards the tachometer instrument. Avoid
sharp bends in the cable, and don't tie-wrap it so that it has to make anything
other than as gentle a bend as you can.
If you change the camshaft nose seal,
it goes into the drive housing with its closed end forward. Remove all traces
of the old gasket, clean both mating surfaces thoroughly, and use a sealing
compound like Hylomar to help the join.
When restarting the engine, allow
it to idle up to normal operating temperature, to check for coolant leaks, before
a road test.
You are welcome to comment
on these pages.