CX/GL
500/650 Rear Wheel Removal
Drum
(Z, A, B, C, D) and Disc (500 Eurosport, all 650s, Turbos) Rear Brake Models
This site tells you
how to remove the rear wheel (and drum brake, if fitted) from your CX/GL, and
replace them. I am very receptive to comments and suggestions, but you use this
information at your own risk.
All the tools, hands
and the bike in the article belong to the author.
All
nut and bolt sizes are quoted as the spanner size required to fit them.
Skill
Levels explained.
Skill Level : 1½.
Personally dirty : 2. Work mess : 1. Tools : 1. Space : 1.
Tools : 10mm, 12mm,
14mm, 22mm ring or socket spanners; socket ratchet handle and extension arm;
rubber mallet; torque wrench;
wire brush; grease; pliers.
Time : Expert 10
minutes, average 15 minutes, "first time" 20 minutes.
Allow the bike to cool so that the
exhaust system is cold, or at least, cool enough to touch.
As you may have to remove one or
both silencers, you might need to make new 'asbestos h-box gaskets'. There is
a very simple way to do this, it's on the Tips
and Tricks page.
Park on the centre stand on a firm
surface. The operation is greatly aided if the left hand silencer is removed
to improve access; but this isn't strictly necessary. However, some 2:1 aftermarket
exhausts which have the silencer on the left hand side may need loosening or
removing.
In order to improve clearance for
the wheel during removal, it's a good idea to fully deflate the tyre, as this
does make things easier.
DRUM BRAKE MODELS
 Remove
the split pin or R-clip from the brake drum torque arm (left) on the lower left
hand part of the rear wheel hub, undo the 10mm nut and prise the arm away from
the bottom of the brake drum assembly. Don't lose the thick rubber washer which
is between the arm and the hub.
Remove
the split pin or R-clip from the brake drum torque arm (left) on the lower left
hand part of the rear wheel hub, undo the 10mm nut and prise the arm away from
the bottom of the brake drum assembly. Don't lose the thick rubber washer which
is between the arm and the hub.
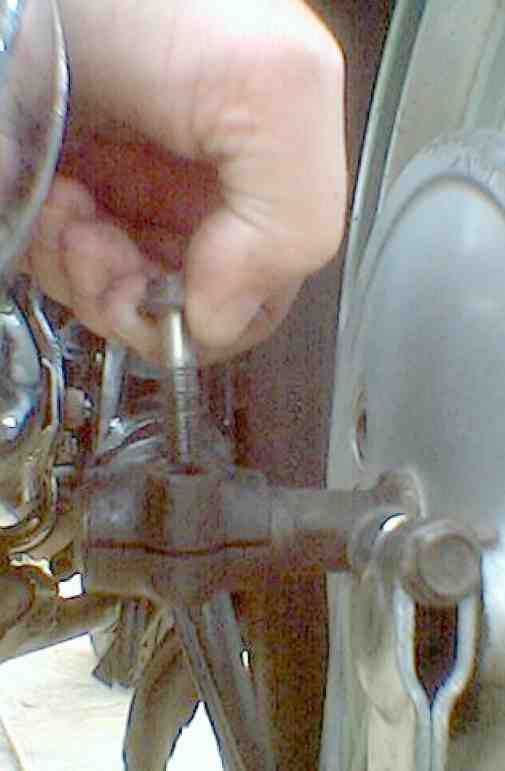
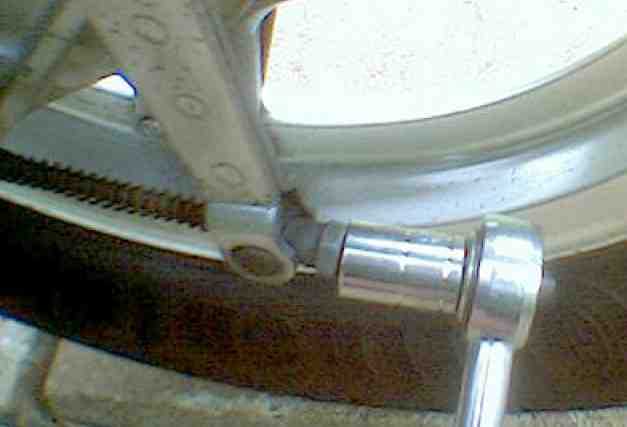 Remove
the brake lever arm's adjusting nut (right) from the end of the actuating rod,
and slide the lever off the actuating rod, don't lose the spring which sits
between the rod's shoulder and the brake lever arm. The brake drum should now
be free to rotate around the axle.
Remove
the brake lever arm's adjusting nut (right) from the end of the actuating rod,
and slide the lever off the actuating rod, don't lose the spring which sits
between the rod's shoulder and the brake lever arm. The brake drum should now
be free to rotate around the axle.
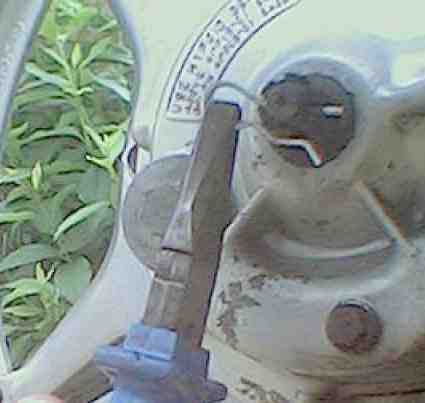 Remove
the split pin or R-clip from the castle nut on the right hand side of the axle
(left). This is the same on both drum and disc brake types.
Remove
the split pin or R-clip from the castle nut on the right hand side of the axle
(left). This is the same on both drum and disc brake types.
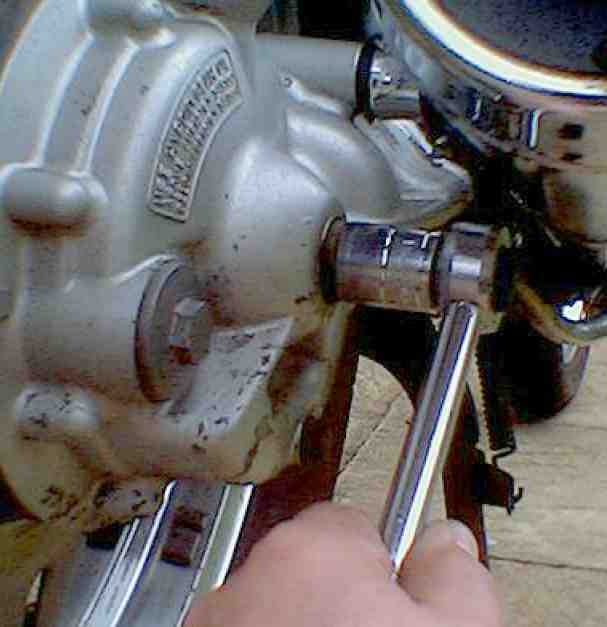 Remove
the 22mm head castle nut and thick washer (right). This is the same on
both drum and disc brake types.
Remove
the 22mm head castle nut and thick washer (right). This is the same on
both drum and disc brake types.
 Undo
and remove the 12mm pinch bolt at the rearmost part of the swinging arm, on
the left hand side of the bike. This is the same on both drum and disc
brake types.
Undo
and remove the 12mm pinch bolt at the rearmost part of the swinging arm, on
the left hand side of the bike. This is the same on both drum and disc
brake types.
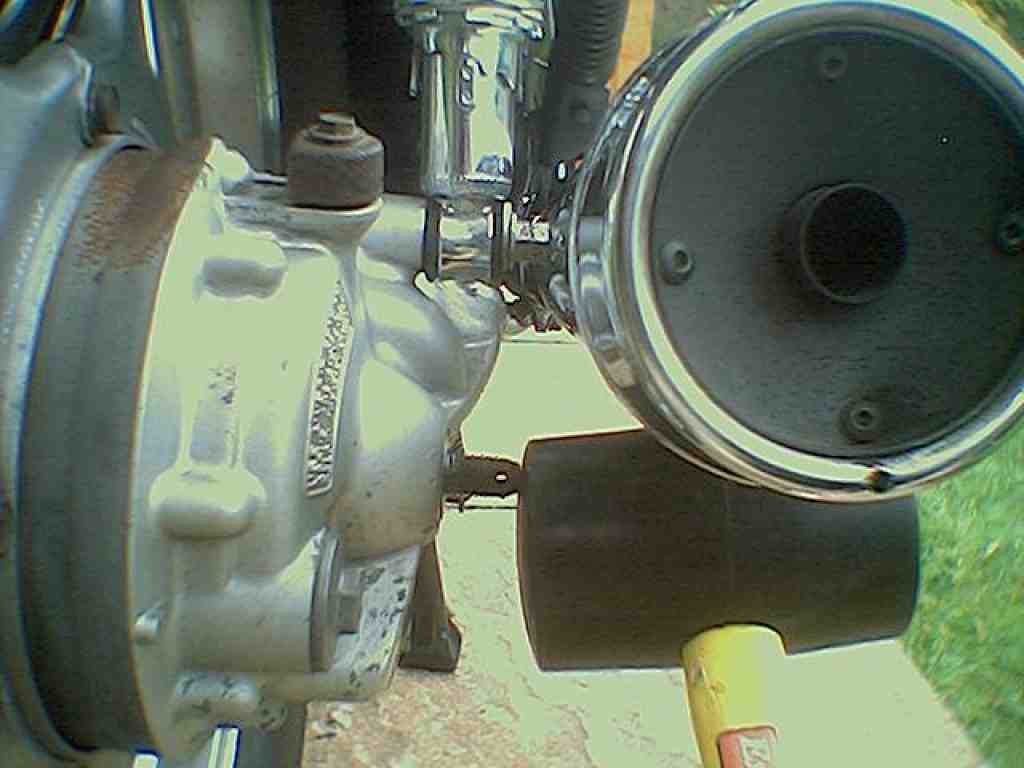 Knock
out the axle from right to left. If you don't have a rubber mallet, use a block
of wood between a normal hammer and the end of the axle.
Knock
out the axle from right to left. If you don't have a rubber mallet, use a block
of wood between a normal hammer and the end of the axle.
Depending on what exhaust system
you have, you may find that the silencers are in the way. Either remove them,
or undo the top or bottom suspension bolts, to allow the swinging arm to drop
lower and clear the exhaust system.
If the axle sticks, poke a broad
bladed screwdriver into the slot right at the end of the swinging arm, where
the pinch bolt fastened. Tap the screwdriver in gently, to open
the gap a little.
This is the same on both drum
and disc brake types.
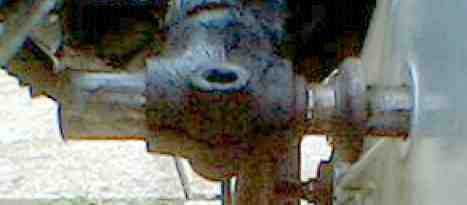 Axle
(left) coming clear of the brake drum and swinging arm. Note the shaped washer.
This is the same on both drum and disc brake types.
Axle
(left) coming clear of the brake drum and swinging arm. Note the shaped washer.
This is the same on both drum and disc brake types.
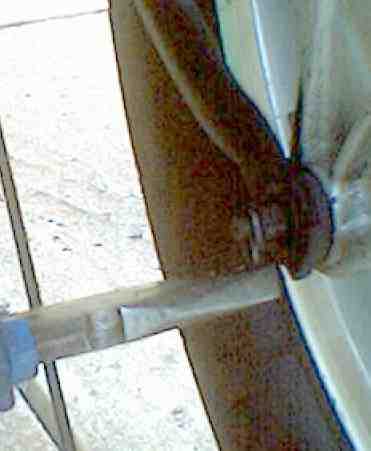
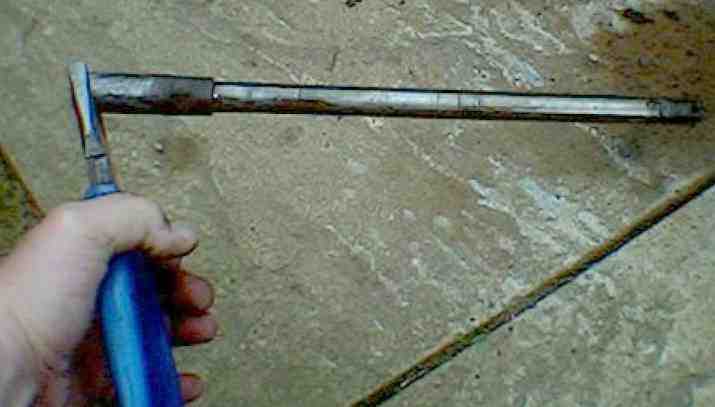 Pull
out the axle (right) and don't lose the shaped collar which is located up against
the brake drum. The rear wheel should now pull towards the left hand side of
the bike and simply drop off the drive mechanism, and fall to the ground.
Pull
out the axle (right) and don't lose the shaped collar which is located up against
the brake drum. The rear wheel should now pull towards the left hand side of
the bike and simply drop off the drive mechanism, and fall to the ground.
 You
may have trouble in wriggling out the rear wheel from the restricted space between
the rear mudguard, tail cone unit and swinging arm.
You
may have trouble in wriggling out the rear wheel from the restricted space between
the rear mudguard, tail cone unit and swinging arm.
Try lifting the bike by its rearmost
part (rack, top box or grab rail) to increase the clearance, or jack up the
bike from under the engine, to give a little more clearance.
It can be a tight squeeze to get
the wheel free. If all else fails, remove the left hand silencer to give you
more room to work. This will, again, often depend on what exhaust system your
bike has fitted. You can also deflate the tyre.
Edvard Korsbt says "I have
found on my GL650 with drum brakes, that it is nessecary to loosen the drive
hub unit to be able to get the tyre out. It's not enough to deflate the tyre.
If you loosen the drive hub (takes 1 minute extra) the rear wheel is easily
taken out. Without its impoosible on my bike, which has totally standard dimension
tyres."
Patrik Blommaskog adds "When
removing the rear wheel as described on your site, like Edvard Korsbt on his
GL650, I found that it was not possible to get the standard dimension tyre past
the drive hub unit. Loosening the three drive hub nuts about 4 mm (removing
the right hand silencer first for access) enabled me to wriggle the wheel out."
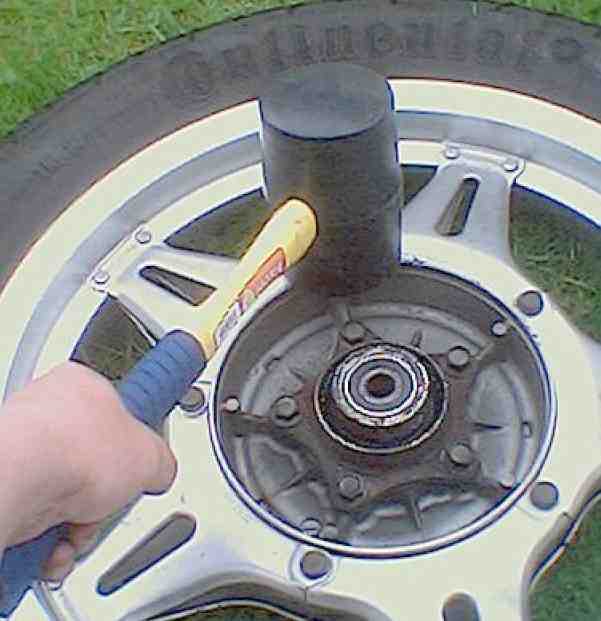 Once
the rear wheel is out, the brake drum lifts away. Beware of inhaling brake dust.
Take the drum brake outside, lay it down with the "drive" side uppermost,
and tap it firmly to dislodge any dust or debris.
Once
the rear wheel is out, the brake drum lifts away. Beware of inhaling brake dust.
Take the drum brake outside, lay it down with the "drive" side uppermost,
and tap it firmly to dislodge any dust or debris.
Check the wear on the shoes, and
replace them if necessary (a future webpage will deal with this); the minimum
thickness is 78/1000" or 2mm.
Refitting is a reversal of this procedure.
Chet comments that you should "loosen
the three nuts holding the final drive in place before tightening the [castle
nut on the] axle with the wheel. This lines up the splines correctly, improving
wear. These three nuts will then be the last ones to tighten making everything
mate up correctly."
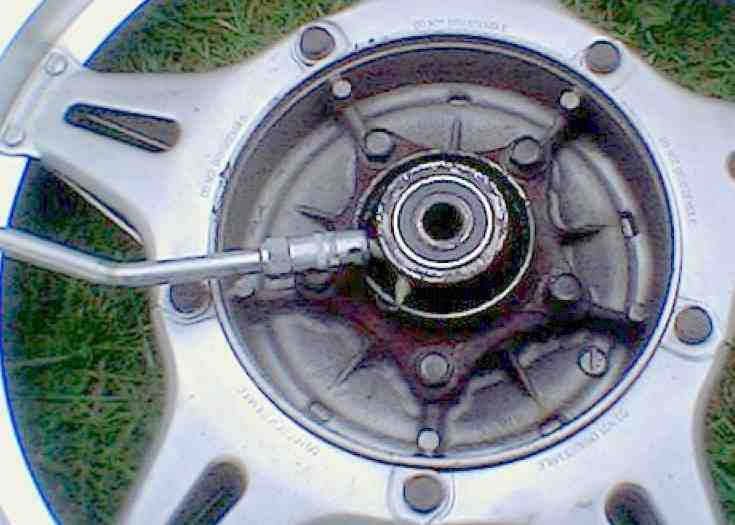 Grease
the drive splines well (left) before reassembly, as excessive wear between the
wheel and the drive hub means a difficult and expensive repair.
Grease
the drive splines well (left) before reassembly, as excessive wear between the
wheel and the drive hub means a difficult and expensive repair.
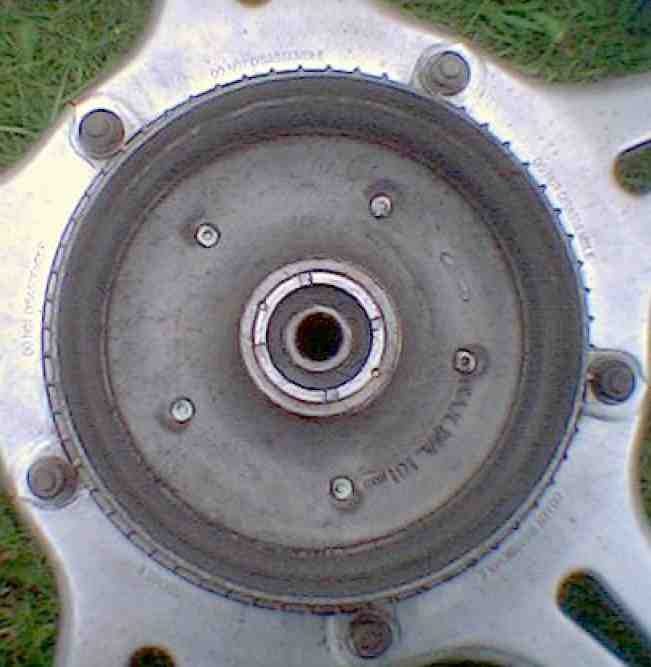
The splined flange in the rear wheel
hub unbolts with the 5 bolts you see here, and can be easily replaced. If anyone
has pictures of replacing the splined part of the differential, I'd be grateful
to receive them. Does the differential splined flange unbolt in a similar way,
or is it part of a larger unit?
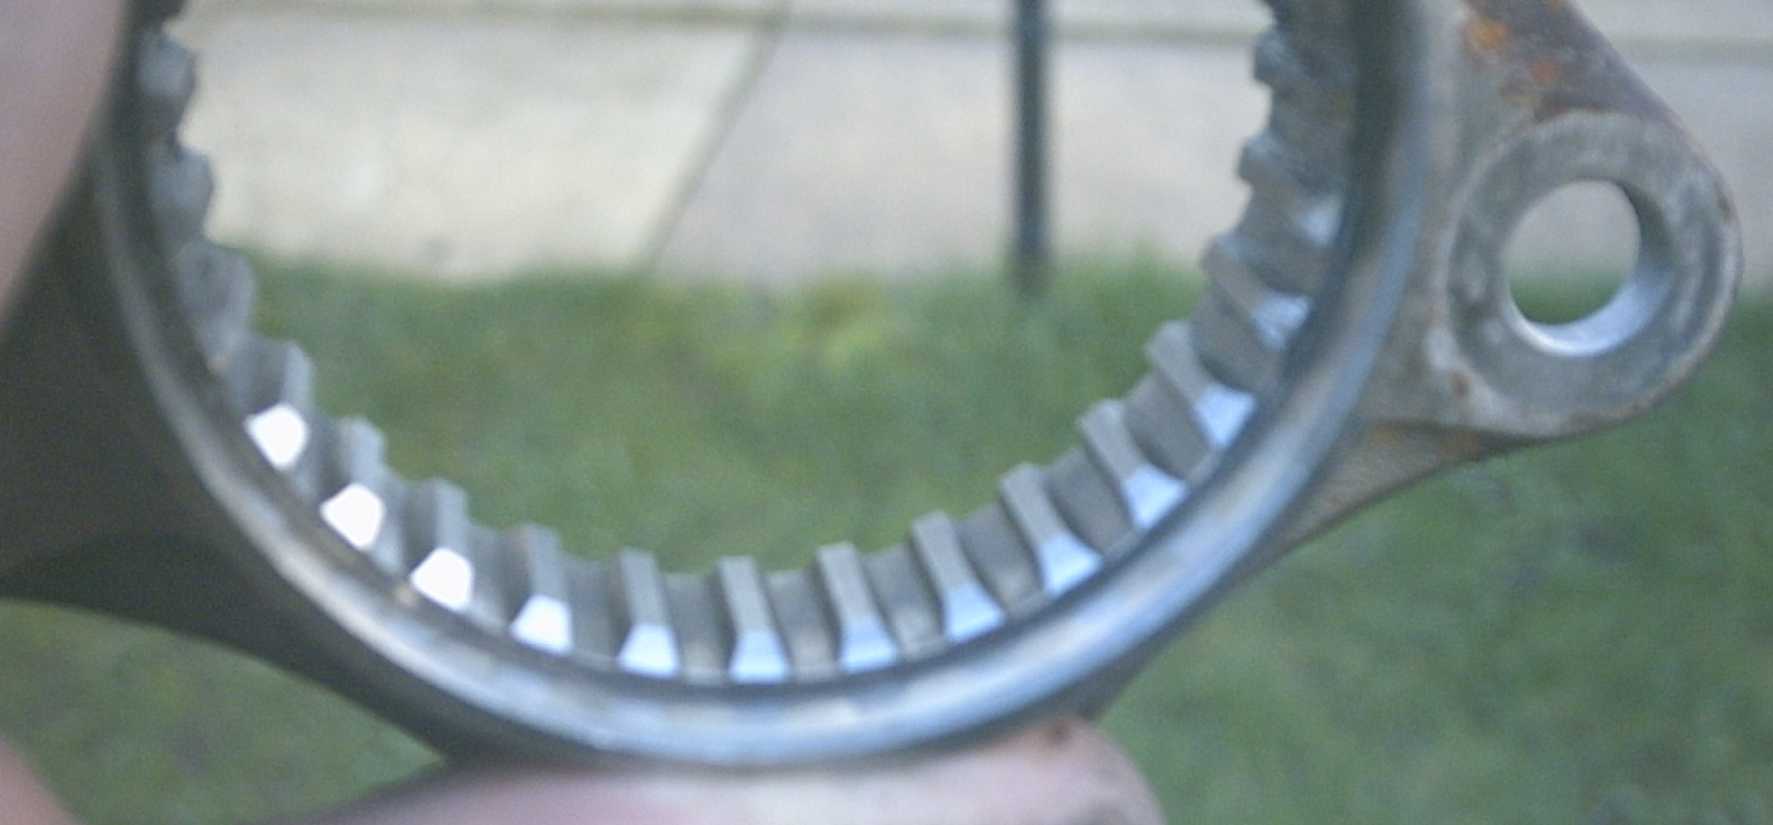
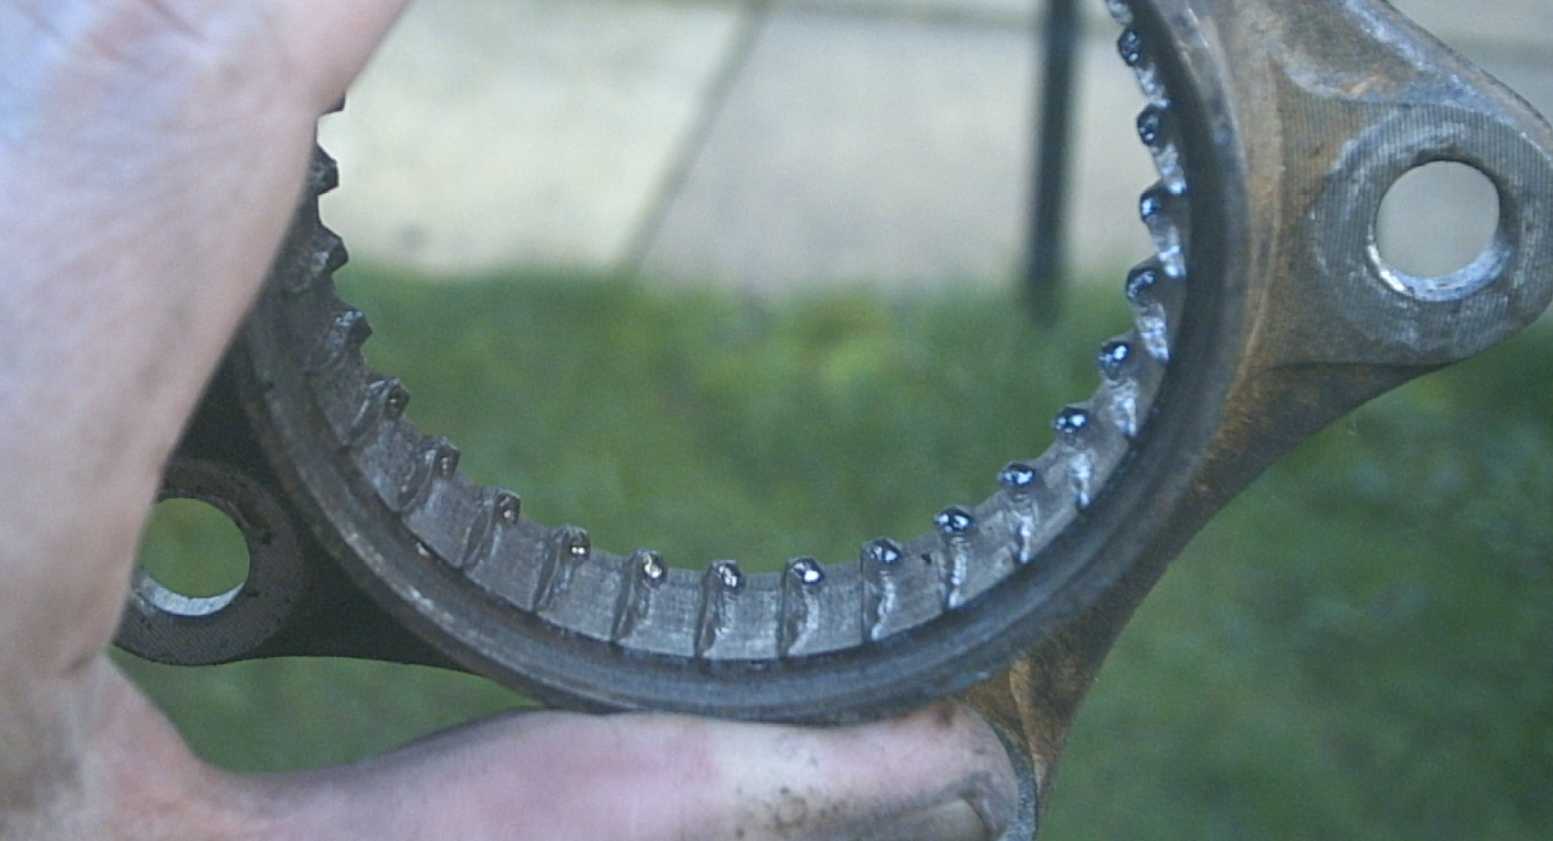 This
is what happens if you don't grease these splined flanges. Notice that the splines
have almost completely worn away.
This
is what happens if you don't grease these splined flanges. Notice that the splines
have almost completely worn away.
Shudder .... I wonder what kind of
awful noise this was making?
 It
should look like this.
It
should look like this.
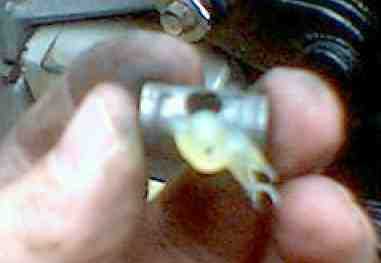 Grease
the brake adjusting mechanism and after reassembly, ensure that the rear brake
works correctly. This is NOT something you want to discover on
a road test!
Grease
the brake adjusting mechanism and after reassembly, ensure that the rear brake
works correctly. This is NOT something you want to discover on
a road test!
Torque Settings
CASTLE NUT : CX650 Custom
and Eurosport 43-58 ft/lbs (6-8 kg/m); all other Pro-Link variants 36-58 ft/lbs
(5-8 kg/m); all other variants 40-47 ft/lbs (5.5-6.5 kg/m).
Pinch bolt 14½-22 ft/lbs
(2-3 kg/m).
Disc rear brake mounting
bolts 7-9 ft/lbs (1-1.2 kg/m)
Drum rear brake torque
arm nuts CX650 Eurosport 13-20 ft/lbs (1.8-2.8 kg/m); all GLs and 650 Custom
11-18 ft/lbs (1.5-2.5 kg/m); all other variants 11-16½ ft/lbs (1.5-2.3
kg/m).
Differential unit retaining nuts
(3 or 4 nuts depending on the model) 33-44 ft.-lb.
Drum Brake Adjustments
Adjustment of the rear drum brake
after reassembly is as follows. With the brake at maximum pressure, the chromed
brake lever should never be further forward vertically than the wheel axle.
If it is, either the brake shoes are worn out, or the brake lever is incorrectly
sited on the splines at the brake drum. There is a punch mark on the chrome
lever which aligns to a similar mark on the splined shaft. Some owners resort
to unbolting the brake arm and moving it round, in a ploy to extend brake life.
However as rear wheel removal is so easy on the CX, it's a simple matter to
replace brake shoes rather than apply this cheat.
Footbrake Lever Adjustments
How the footbrake lever sits in relation
to your toes is largely a matter of personal choice. I like the footbrake pad
height not quite touching my right toes when riding normally, and with about
1/3" of free play before the brake begins to bite. To adjust this, look
underneath the bike on the right hand side and locate the adjusting screw. Slacken
the 10mm locknut and then screw in or out the stop-screw until the footbrake
lever is at the desired height. Then tighten the locknut.
If the height cannot be adjusted
by means of the stopscrew, unbolt and remove the footbrake lever from its spindle,
and move it round as necessary, one spline at at time. Then use the stopscrew
for fine adjustments.
I recommend fitting new split pins
where necessary, but R-clips are a much better proposition. Your local bike
or spares dealer should have a selection.
Additional Pictures
 Drive
hub unit, with the rear wheel removed.
Drive
hub unit, with the rear wheel removed.
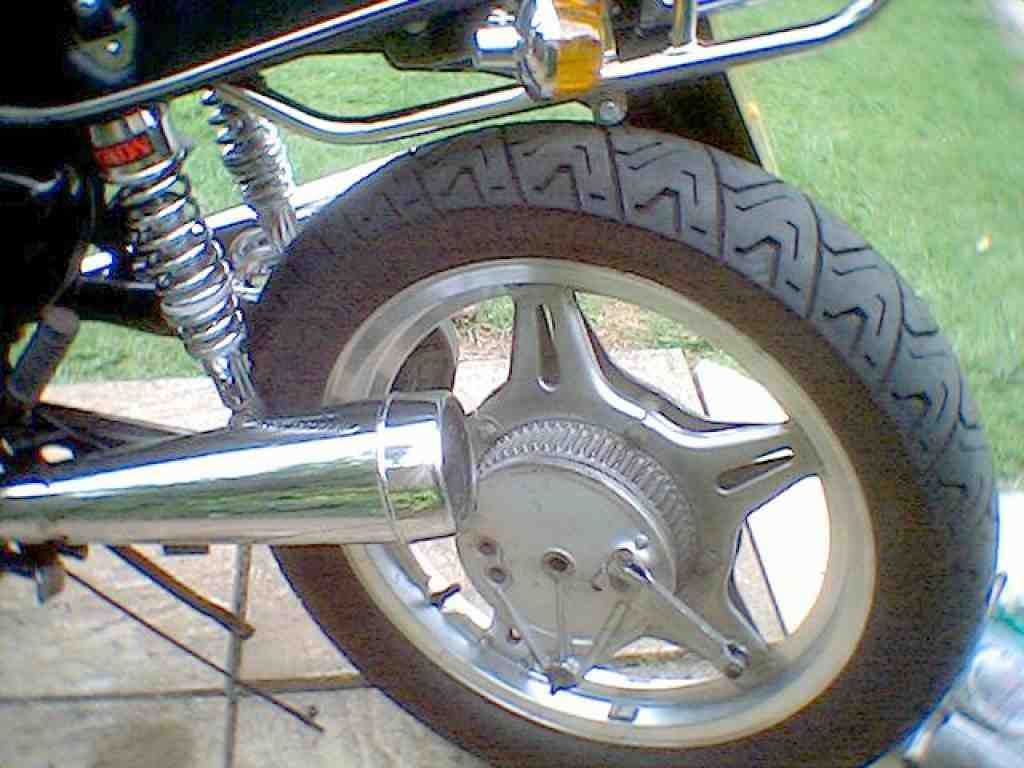
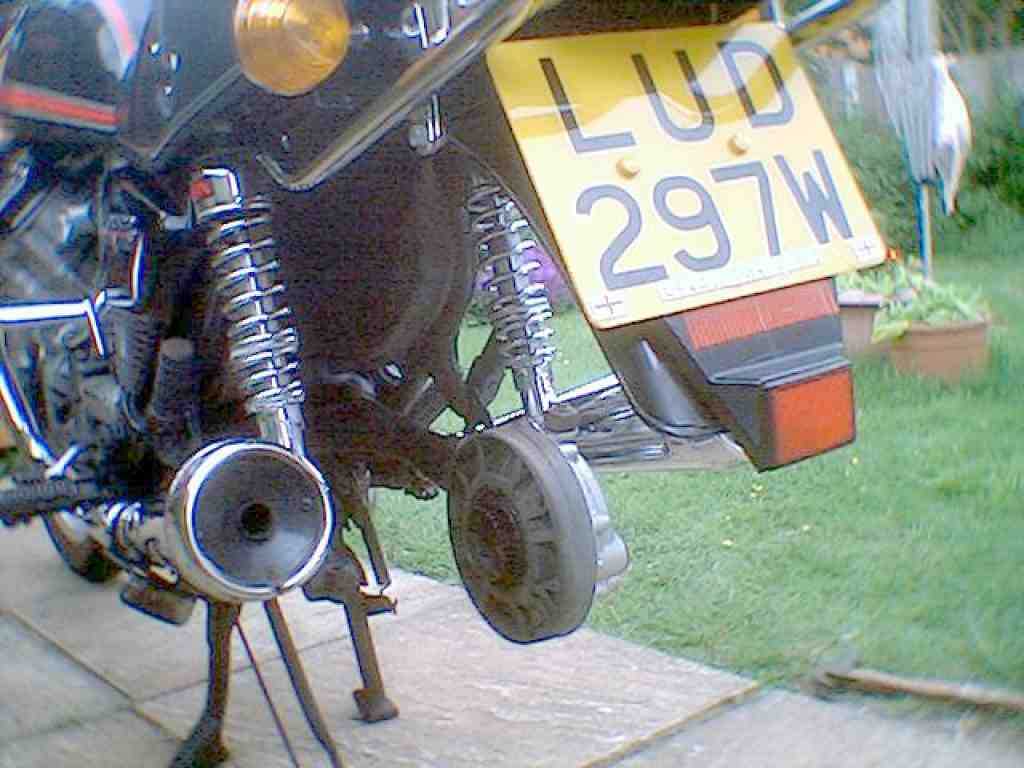 General
view of the bike with the rear wheel removed.
General
view of the bike with the rear wheel removed.
 Correct
location of the collar, between the axle and the brake drum.
Correct
location of the collar, between the axle and the brake drum.
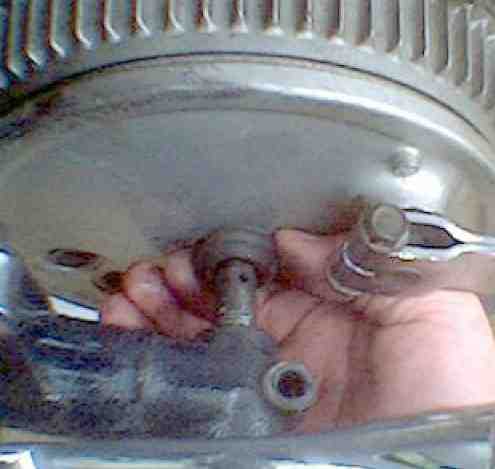
 Inside
the hub (right), into which the brake drum locates.
Inside
the hub (right), into which the brake drum locates.
 Brake
drum, shoes, and mechanism (left).
Brake
drum, shoes, and mechanism (left).
DISC BRAKE MODELS
The procedure is very similar to
the drum brake models, except that there is no brake torque arm to unfasten.
Remove as much of the exhaust system
as you need to be able to withdraw the axle from the left hand side. This probably
means removing the left hand silencer. Remove the split or r-pin from the axle's
castle nut and remove that as well. Remove the pinch bolt on the left rear end
of the swinging arm. Remove the two bolts which hold the rear brake caliper
to its bracket.
Without unfastening the hydraulic
hose, pull the caliper upwards to clear the disc. If you have trouble with this,
put strong pressure on the caliper face and push it inwards towards the wheel
hub, this retracts the brake pistons. If this still doesn't work, slide a wide
blade screwdriver in from behind the caliper and gently but firmly lever the
caliper away from the disc.
Now knock the axle through from the
right, as per the drum brake model, and withdraw it to the left. Once the axle,
space and brake caliper are clear, suspend the caliper so that it doesn't dangle
and possibly damage the hose or paintwork. Wirebrush clean the caliper body
and as much of the inner area as you can reach. You can use ACF-50 or light
grease on the piston and moving parts area, but don't get any on the pads or
disc surface.
Now swing the caliper bracket upwards
to clear the disc. The Turbo has an aluminium spacer between the inside
face of the swinging arm, I expect the other disc brake models are the same,
please correct me if not. The wheel can be pulled towards you off the drive
splines and then wriggled out backwards and to the left. It is a tight fit and
can be a struggle; extra clearance is possible by either removing the rear mudguard
or having someone lift the rear of the bike an inch or two. If you do this be
careful that the centre stand doesn't retract.
Also try completely deflating the
tyre, as this does give extra clearance. Clean everything thoroughly before
reassembly.
Refitting is a reversal of removal,
grease the drive splines thoroughly as per the drum brake type. After refitting,
pump the rear brake pedal several times to restore pressure and re-align the
disc brake caliper and pads.
You are welcome to comment
on these pages.