 Remove
the 8mm head bolts which attach the front crankcase, and gently pry off the
front cover. Don't use force, and especially don't use a screwdriver between
the mating faces.
Remove
the 8mm head bolts which attach the front crankcase, and gently pry off the
front cover. Don't use force, and especially don't use a screwdriver between
the mating faces. CX/GL 500/650 Oil Pump Removal
This site will tell you how to remove the oil pump mechanism. I am very receptive to comments and suggestions but you use this information at your own risk.
Skill Level with engine out : 1. with engine in frame : 2. Personally dirty : 2. Work mess : 1. Tools : 1. Space : 1.
You don't need to remove the engine from the frame. In most of these pictures, Valiant's engine is removed, but it was out anyway, for other work to be done.
All nut and bolt sizes are given as the spanner size required to fit them.
Warm the engine and then drain the oil. It is not absolutely essential to remove the radiator, as you can get by with just lifting it out of the way after unbolting it, but really it's better to remove it. The front casing is much easier to remove if the radiator and fan are not in place.
Disconnect the clutch cable at the clutch end. This is secured by two 10mm nuts; slacken them full off, use a pair of pliers to raise the clutch arm, and slide out the nipple (at the end of the cable) from the clutch arm.
Remove
the 8mm head bolts which attach the front crankcase, and gently pry off the
front cover. Don't use force, and especially don't use a screwdriver between
the mating faces.
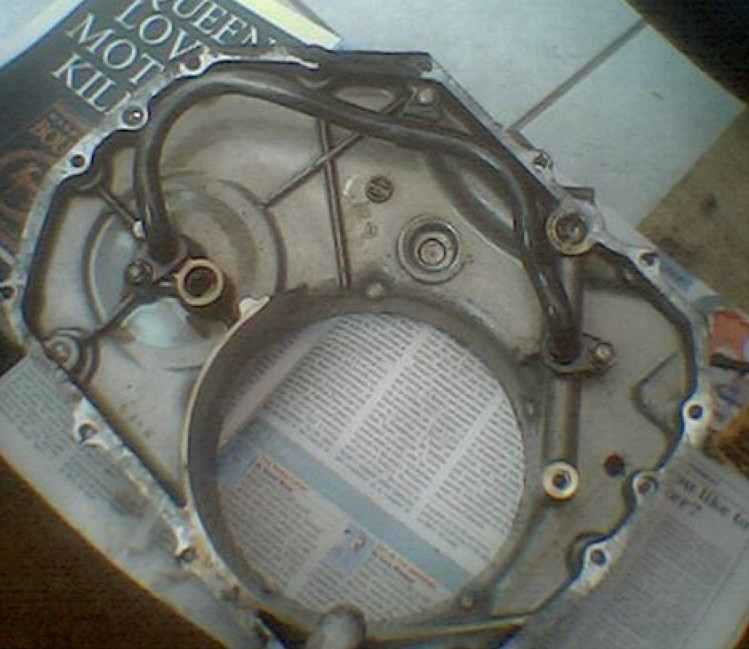
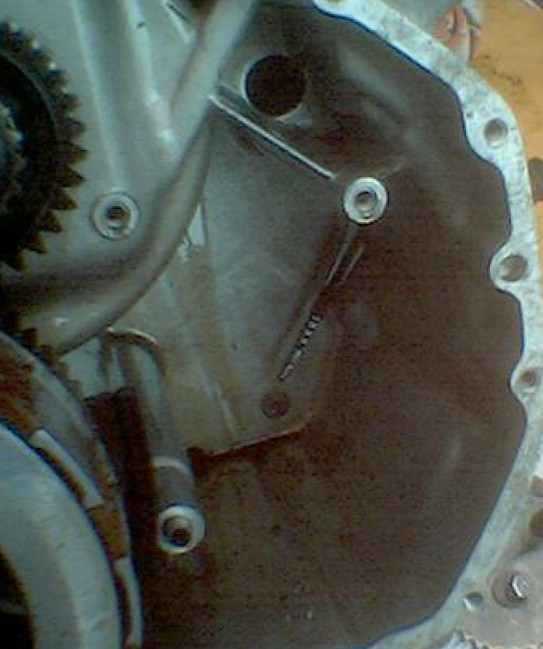
In the photo (right) the clutch cover has been taken off as well, but you needn't do this.
The bendy black tube is one of the oil feeds.
Carefully remove all traces of the old gasket.
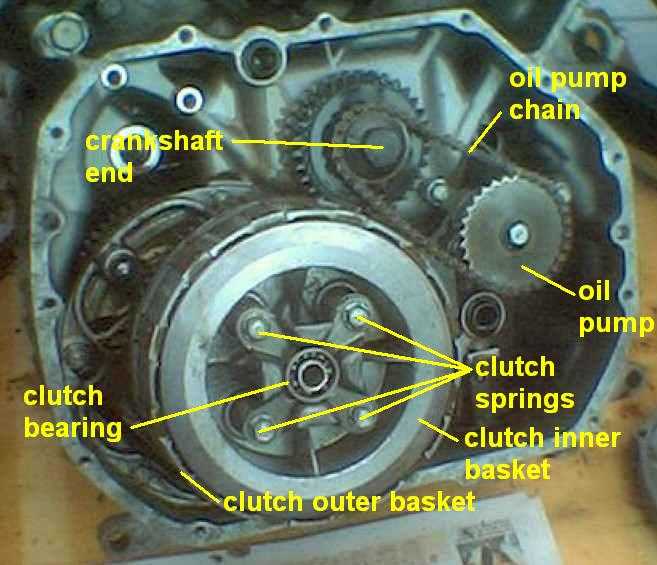
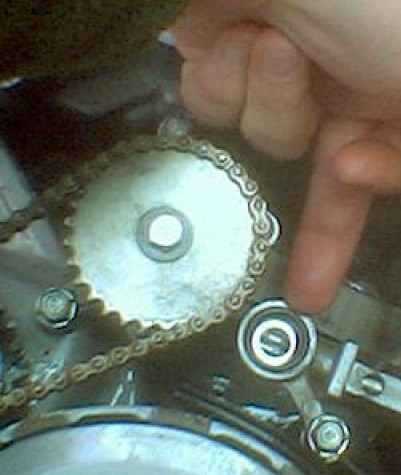
Inside the open engine (left). The oil pump itself is hidden behind the large shiny sprocket. This is driven by a chain directly from the crankshaft.

Close-up of the crankshaft end, the oil pump drive chain, its sprocket and you can just see the oil pump behind the sprocket.
The large outer pinion on the crankshaft is what drives the clutch outer basket. This drives the inner basket and that connects to the gearbox.
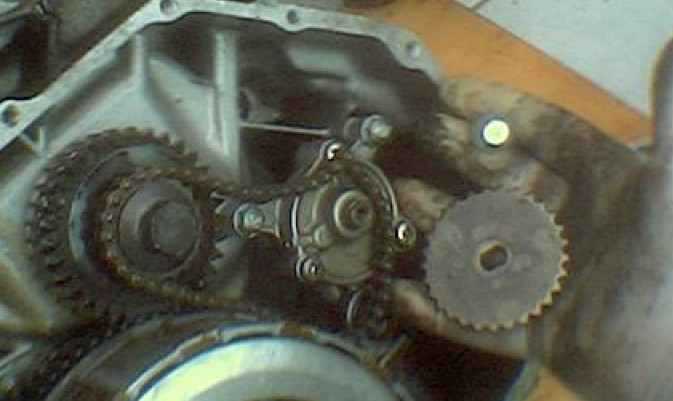
Remove the bolt which holds on the sprocket, and pull it off with the chain (left).
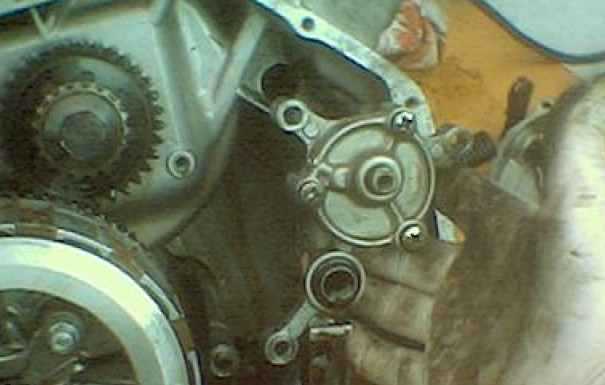
Unbolt the oil pump from the opened crankcase, and pull it off complete with its lower pipe and the metal strainer.

Frightening isn't it, what was caught on the strainer? Having upturned (left) the strainer, this is what I found. Tiny bits of metal, plus some slivers of gasket and sealing compound.
If you are not replacing the pump, wash off all these bits in paraffin or petrol.
 The
oil pump chain is a continuous one and does not have a split link. If it shows
sign of wear, or on reassembly it cannot be correctly tensioned, you should
replace it.
The
oil pump chain is a continuous one and does not have a split link. If it shows
sign of wear, or on reassembly it cannot be correctly tensioned, you should
replace it.
The CX500 oil pumps are extremely simple in operation and correspondngly reliable; they often go to 100,000 miles without replacement. They are what's called trochoidal, which means that they work rather like a heart. An inner star-shaped steel rotor, with four arms, rotates inside an outer rotor with five corresponding cutouts. Oil is pumped between the chambers as the assembly rotates, and goes out into the oil passageways inside the engine.
I'd recommend changing the chain at 40,000 miles but the pump will be good for more than this. If you want to dismantle the pump itself, do so under surgically clean conditions. You can check the internal tolerances if you want to, but you'll probably need an impact driver to get the holding screws out. If you dismantle the pump, there should not be more than 39/1000ths clearance between the inner and outer rotors, and no more than 138/1000ths between the outer rotor and the body of the pump. On reassembly, note that the punch mark on the outer rotor faces outwards, you should be able to see it during reassembly.
Before reassembly, wash or wipe out the oil sump at the bottom of the crankcase area (left). You can see the dipstick poking through in the picture. Any sludge or muck shows neglect in changing the oil and filter.
A well maintained engine should be free of all deposits.
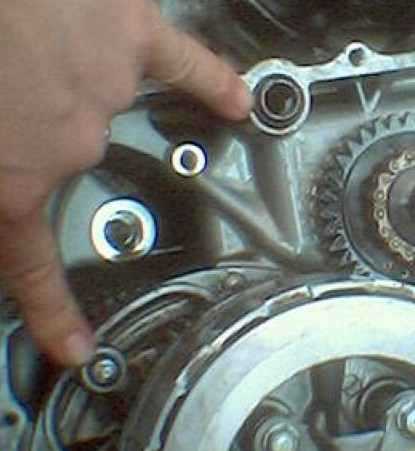
Reassembly is a simple process. Don't forget to renew the O-rings around the oil transfer passages. Ensure the 2 hollow dowels are in place; the one at the top (right) and the one between the oil pump body and the front casing.
Don't omit the oil jet and O-ring adjacent to the clutch (right).
Finally remember to replace the O-ring directly beneath the oil pump. This feeds into the curly pipe built into the front crankcase cover.
To correctly tension the chain, replace the oil pump on its mountings and insert the holding bolts not quite finger tight. Loop the chain over the crankshaft pinion and over the oil pump sprocket and locate the sprocket on the pump. It sits in a shaped slot on the oil pump's spindle. Insert the sprocket's locking bolt and tighten it to 6-9 ft lbs.
Now wiggle the pump on its mounting bolts so that there is no slack in the chain and tighten the bolts to 6 ft lbs. Check the chain again afterwards.
When replacing the front cover, I recommend using a gasket sealant like Hylomar, spread thinly onto both faces, with the actual gasket in between. Insert the 8mm head bolts and tighten finger tight, then in a diagonal sequence to not more than 6 ft lbs - they are easily stripped. Wipe off any excess sealant.
Tachometer (rev counter) drive
CXs sometimes develop an oil smear from the behind the radiator. This weep comes from a failed oil seal on the tachometer casing. It is easily replaced without removing the front cover, but you do need to remove the radiator and fan. You'll need a new oil seal and tacho casing gasket.
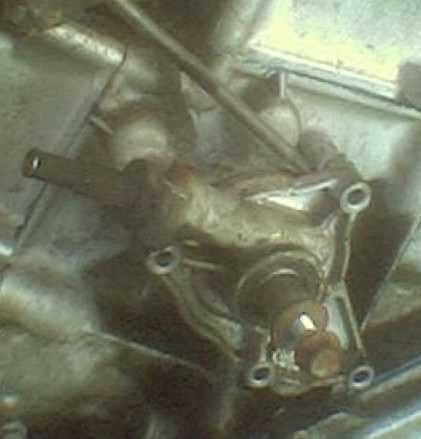 The
tacho drive assembly is bolted over the front end of the camshaft, directly
behind the radiator and directly above the crankshaft. It's held on with four
bolts, and then the assembly can be gently prised off (left). Carefully remove
all traces of the old gasket.
The
tacho drive assembly is bolted over the front end of the camshaft, directly
behind the radiator and directly above the crankshaft. It's held on with four
bolts, and then the assembly can be gently prised off (left). Carefully remove
all traces of the old gasket.
The leaking seal is the one which fits inside the tacho drive casing, over the end of the camshaft. Poke out the old seal and insert the new one, it goes with its closed end facing outwards, towards the fan. Before refitting the casing, smear a glob of grease over the camshaft's end. Then fit the new casing gasket, again with a sealant like Hylomar.
Tighten the four holding bolts back to 6-9 ft lbs.
I recommend changing the oil and filter after 500 miles.
You are welcome to comment on these pages.