 Many
thanks to Carl McNamee (left) and Laurent Perron,
who provided the high quality digital photos used in this page. Carl says "I'm
the dorky looking guy with the beard!"
Many
thanks to Carl McNamee (left) and Laurent Perron,
who provided the high quality digital photos used in this page. Carl says "I'm
the dorky looking guy with the beard!"CX / GL 500 / 650 Forks and Fork Seals
This page will show you how to remove, examine and replace the front fork oil seals on your CX or GL.
Skill Level : 2. Dirty Level : 2. Work Mess Level : 2. Tools level : 3 and use a torque wrench. Space required : 2
Time : Expert 2 hours; Average 3 hours; "First-time" a half day.
All nut and bolt sizes are given for the spanner size required to fit them.
Many
thanks to Carl McNamee (left) and Laurent Perron,
who provided the high quality digital photos used in this page. Carl says "I'm
the dorky looking guy with the beard!"
Words : Rob Davis
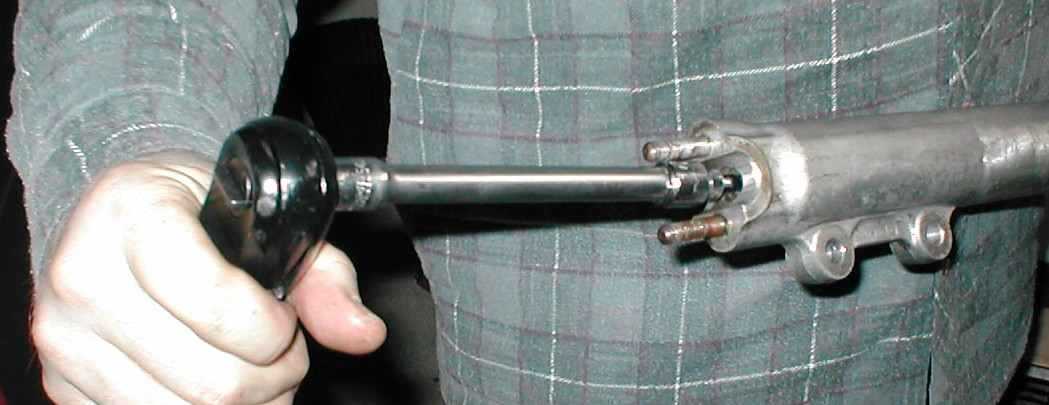
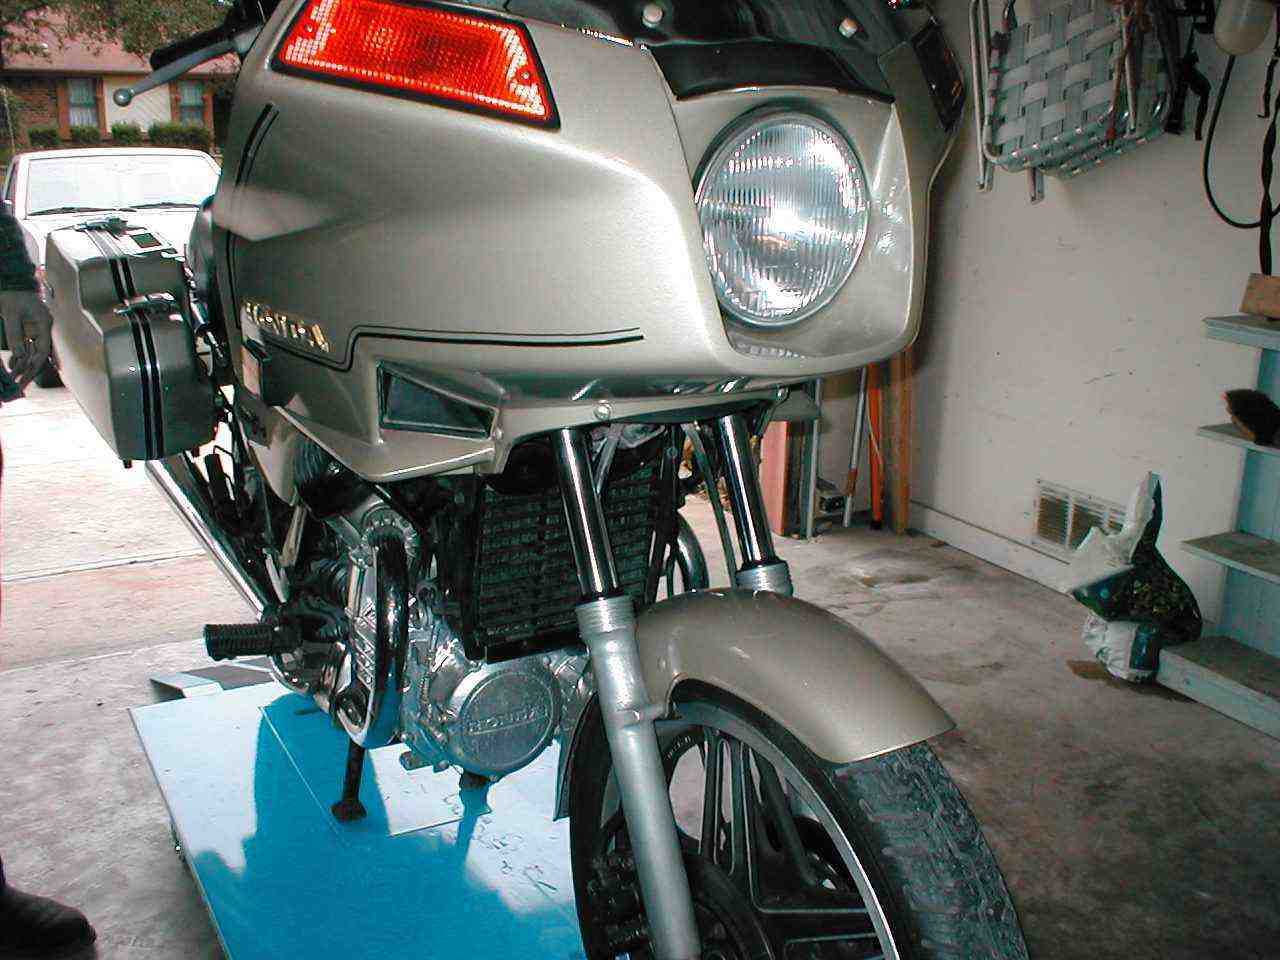 The
bike used (left) was Laurent's (American) GL500. Note that it has air forks,
and that its lower fairing section had to be removed. There are differences
between this model, the CX500Z/A/B and Eurosport models. Don't panic if the
photos don't match your variant - but I advise that you have a workshop manual
to hand, to illustrate the differences.
The
bike used (left) was Laurent's (American) GL500. Note that it has air forks,
and that its lower fairing section had to be removed. There are differences
between this model, the CX500Z/A/B and Eurosport models. Don't panic if the
photos don't match your variant - but I advise that you have a workshop manual
to hand, to illustrate the differences.
I am very receptive to comments and suggestions, but you use these pages entirely at your own risk.
Removal Procedure
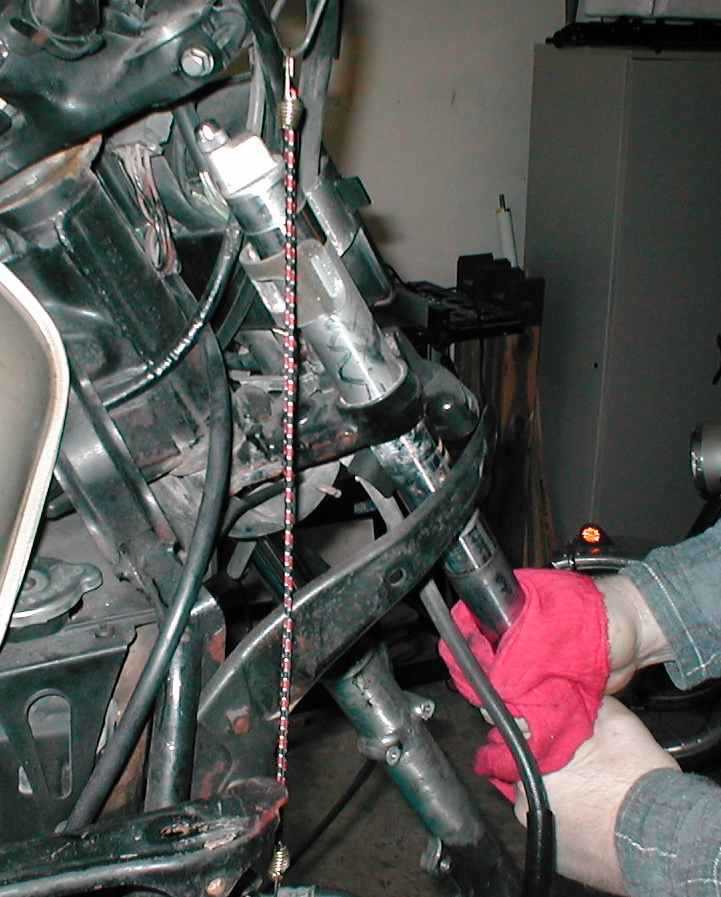
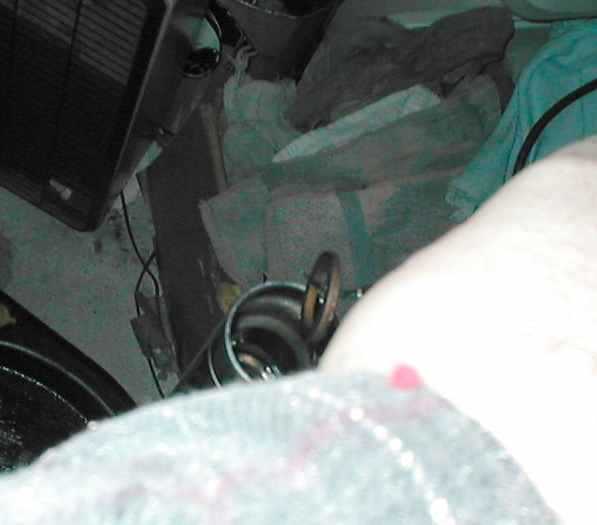
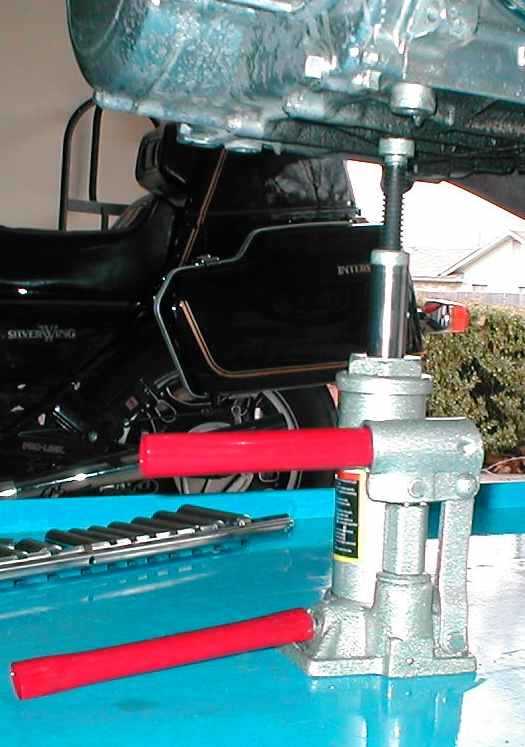 Place
the bike on its centre stand on a firm surface and turn off the ignition. Jack
up the engine securely (right) so that the front wheel is well clear of the
ground. It's recommended to disconnect the battery, but this is not essential.
Place
the bike on its centre stand on a firm surface and turn off the ignition. Jack
up the engine securely (right) so that the front wheel is well clear of the
ground. It's recommended to disconnect the battery, but this is not essential.
If your bike has a fairing, remove its lower section.
 Unbolt
and remove the bolts holding on each brake caliper (left). Each caliper has
two 14mm head bolts holding it to the bottom of the fork leg.
Unbolt
and remove the bolts holding on each brake caliper (left). Each caliper has
two 14mm head bolts holding it to the bottom of the fork leg.
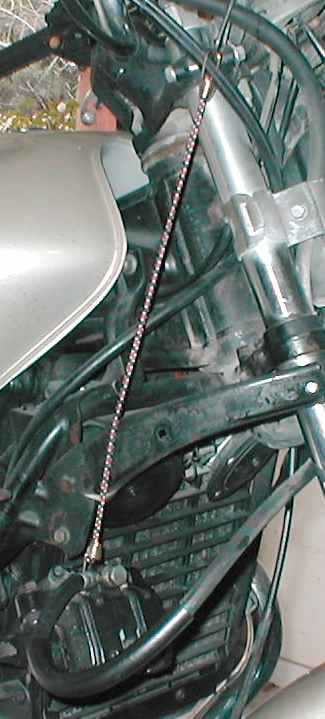 Support
the brake calipers on lengths of cord, or as in this case, bungee elastics (right).
Don't let them hit the petrol tank and damage it, and ensure that they are kept
out of the way of your working area.
Support
the brake calipers on lengths of cord, or as in this case, bungee elastics (right).
Don't let them hit the petrol tank and damage it, and ensure that they are kept
out of the way of your working area.
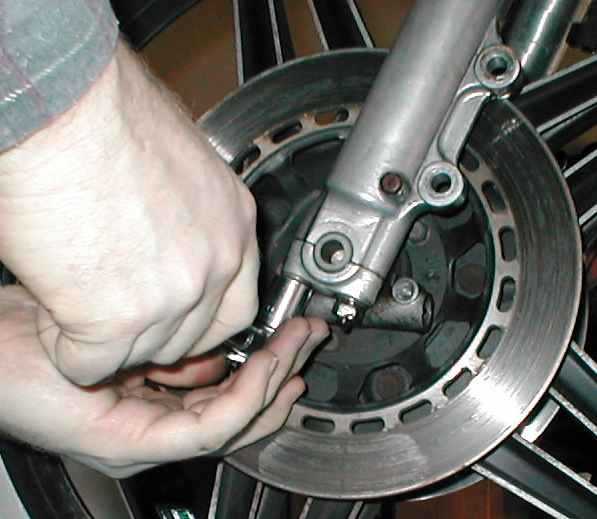
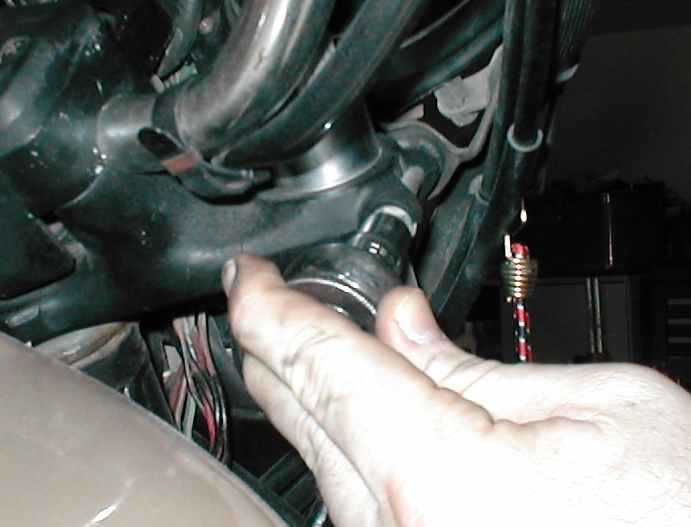
 Disconnect
the speedometer drive cable at the bottom of the LH fork leg (left) and pull
it out from the fork. Loop or tie it out of the way.
Disconnect
the speedometer drive cable at the bottom of the LH fork leg (left) and pull
it out from the fork. Loop or tie it out of the way.
The retaining crosshead screw can be stubborn and you may have to use an impact driver to get it out.
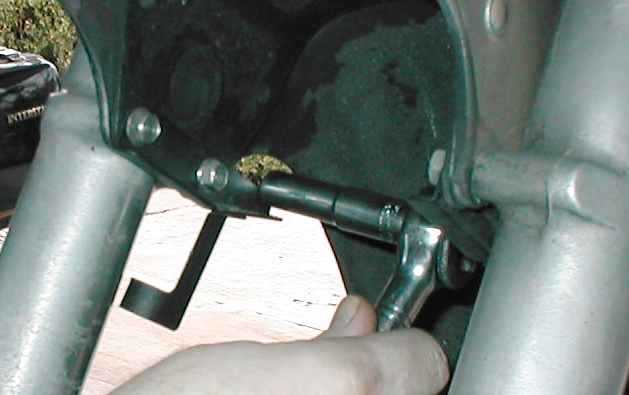
 Remove
the split pin or R-Clip from the front axle castle nut, and remove it. Undo
the two holding bolts which clamp the wheel axle in place into the split half
of the bottom of the LH fork leg (right). Some variants have this split bottom
on both fork legs; some on only one of them.
Remove
the split pin or R-Clip from the front axle castle nut, and remove it. Undo
the two holding bolts which clamp the wheel axle in place into the split half
of the bottom of the LH fork leg (right). Some variants have this split bottom
on both fork legs; some on only one of them.
Using a soft mallet, knock the axle through from the side the castle nut was on, towards the other side, and the front wheel will drop out (it's surprisingly heavy). Don't lose the small annular gear which drives the speedo cable, and give its insides a good dollop of grease.
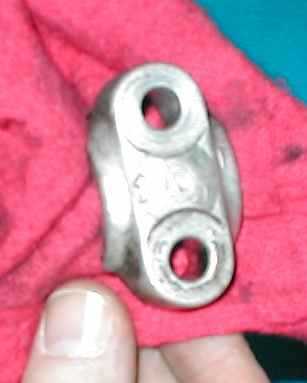 Close-up
of the split fork end. There is an arrow cast into it which shows you which
way it goes back; the arrow faces forward.
Close-up
of the split fork end. There is an arrow cast into it which shows you which
way it goes back; the arrow faces forward.
Replace all bolts and washers finger-tight, so you don't lose them.
 Remove
the bolts (right) which hold the mudguard to the fork leg, and pull away the
mudguard. Give it a good clean especially the underside, where muck collects.
If it's a metal or chrome mudguard, spread a generous amount of plain grease
all over its underside, working it well into the cavities. This will stop it
rotting.
Remove
the bolts (right) which hold the mudguard to the fork leg, and pull away the
mudguard. Give it a good clean especially the underside, where muck collects.
If it's a metal or chrome mudguard, spread a generous amount of plain grease
all over its underside, working it well into the cavities. This will stop it
rotting.
On many variants, the mudguard has an integral underbody strengthening arch which also acts as a fork brace. If this rots or rusts, the rigidity of the front forks is seriously compromised and will adversely affect the bike's handling. If you are in doubt that the mudguard is good, fit a new one.
Some variants (with plastic or glass fibre mudguards) have a genuine fork brace fitted; if so, remove it.
Brent Evered comments : "One suggestion I had, was that you might want to remove the caps from the tops of the fork tubes while they are still on the bike, since it provides you with a built-in vice. Same with re-installation: wouldn't it be easier to put the forks into place first, then install the oil, springs and top caps? I haven't done this job on the 500 yet, but I've done it on a couple of other bikes, and it never occurred to me to wait until the fork tubes were off the bike to remove the caps and springs, so it may be that you are aware of something I haven't thought of. (Certainly wouldn't be the first time!)"
This strikes me as being a good
idea, especially if you don't have a workbench and a vice. BUT there is
a danger of crushing the fork tubes out of their natural circle shape - so don't
remove the fork caps if you use this method, as they'll help keep the forks
in their correct shape.
 Remove
the electrical connections box (left) from its brackets. There's no need to
disconnect anything, but you need these clamps off (right) to be able to drop
out the forks. On regular CX500s, this job isn't necessary, as the connections
are inside the headlight shell.
Remove
the electrical connections box (left) from its brackets. There's no need to
disconnect anything, but you need these clamps off (right) to be able to drop
out the forks. On regular CX500s, this job isn't necessary, as the connections
are inside the headlight shell.
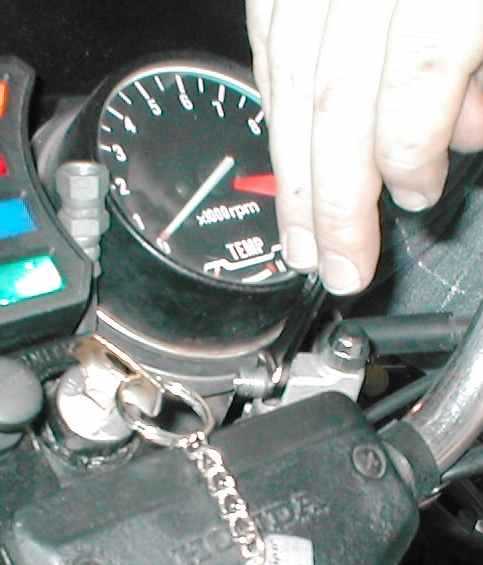 Loosen
the RH fork top air balance pipe (left) and then the LH one.
Loosen
the RH fork top air balance pipe (left) and then the LH one.
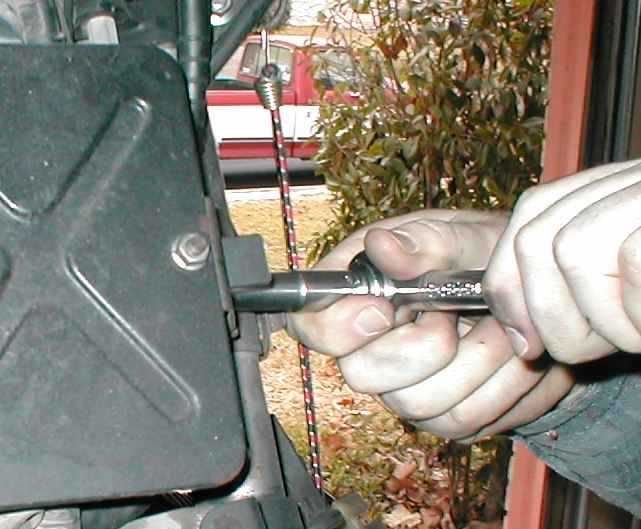
 Fully
slacken the pinch bolts at the top of each fork yoke (right) and the pinch bolts
on the lower section of the fork yoke (below).
Fully
slacken the pinch bolts at the top of each fork yoke (right) and the pinch bolts
on the lower section of the fork yoke (below).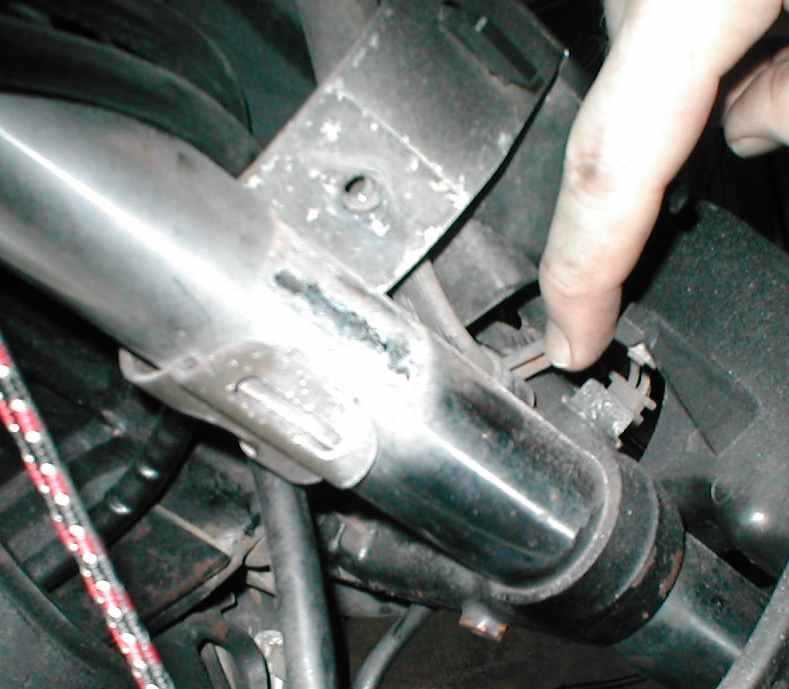
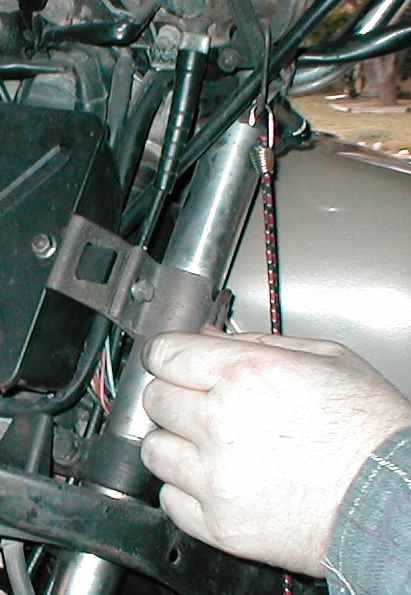
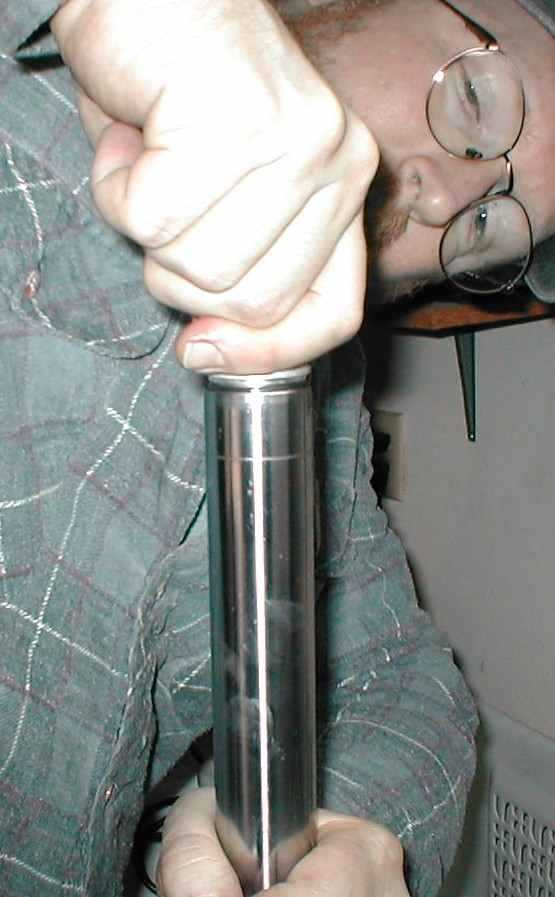
 Grasp
one fork leg firmly and twist or wriggle it out of its mounting. They can be
a stubborn fit; if you have trouble, try a soft strap wrench (NOT a chain wrench)
and squirt WD40 or releasing agent around the mounting and pinch bolt areas,
and then use a soft mallet to dislodge the fork leg.
Grasp
one fork leg firmly and twist or wriggle it out of its mounting. They can be
a stubborn fit; if you have trouble, try a soft strap wrench (NOT a chain wrench)
and squirt WD40 or releasing agent around the mounting and pinch bolt areas,
and then use a soft mallet to dislodge the fork leg.
Be careful and don't try and separate the pinch bolt slot on the fork yoke, as if you break or split it, you will need to replace the entire steering yoke.
When both fork legs are out, clean them throughly as they also tend to collect rust and corrosion.
The next steps apply to each fork leg in turn. Don't work on both legs together, as it's best not to mix up the left and right fork leg parts.
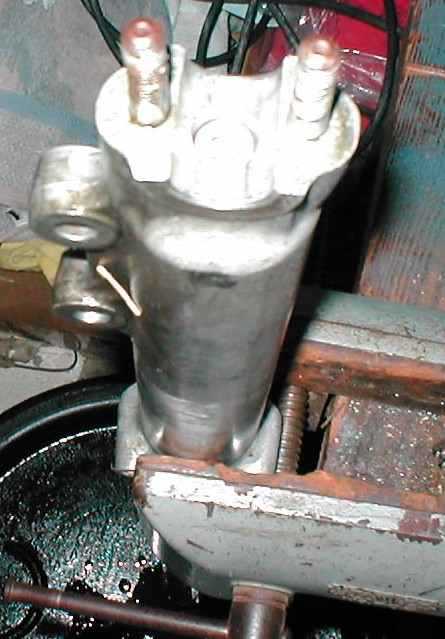
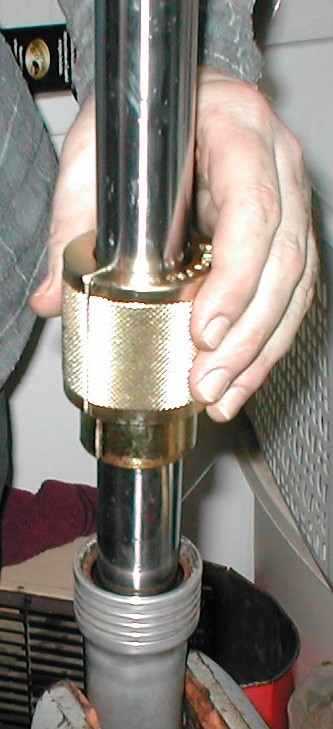
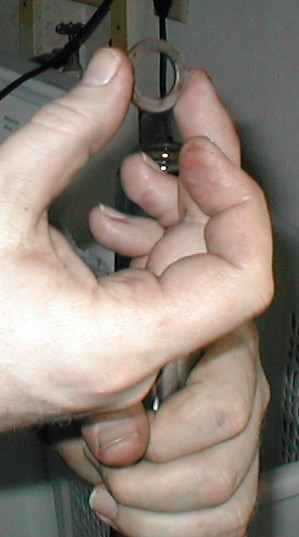
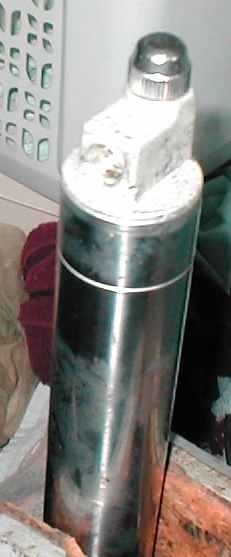 Here
is a closeup of the top of a fork leg, showing the white air suspension cap
and the feeder aperture to the other fork leg. These caps unscrew, but they
can be very stubborn, partly because they get stuck, and also because they are
under some tension force from the compressed spring inside the fork leg.
Here
is a closeup of the top of a fork leg, showing the white air suspension cap
and the feeder aperture to the other fork leg. These caps unscrew, but they
can be very stubborn, partly because they get stuck, and also because they are
under some tension force from the compressed spring inside the fork leg.
Unscrew the cap carefully and don't get your face or eyes in the way, as the cap may well shoot off suddenly as it comes fully unscrewed.
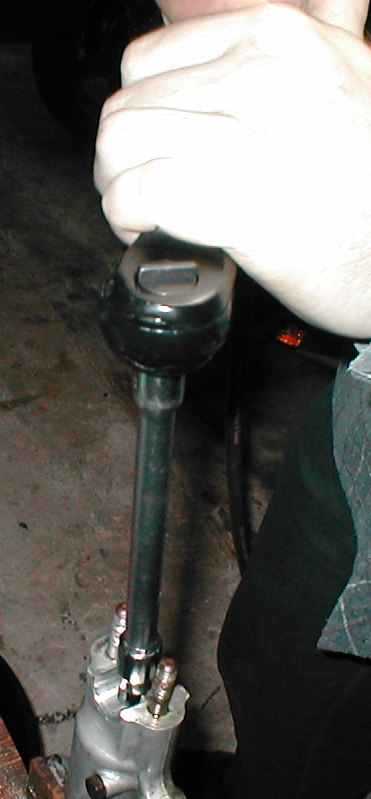
 If
it will not budge, try applying a gentle local heat source (right) to free it
up.
If
it will not budge, try applying a gentle local heat source (right) to free it
up.
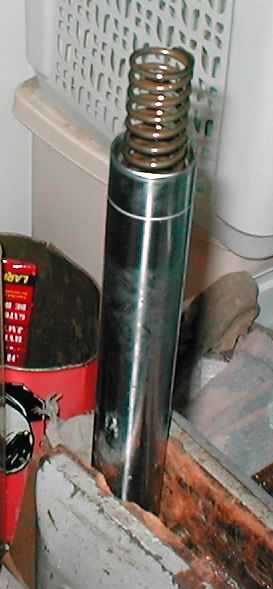
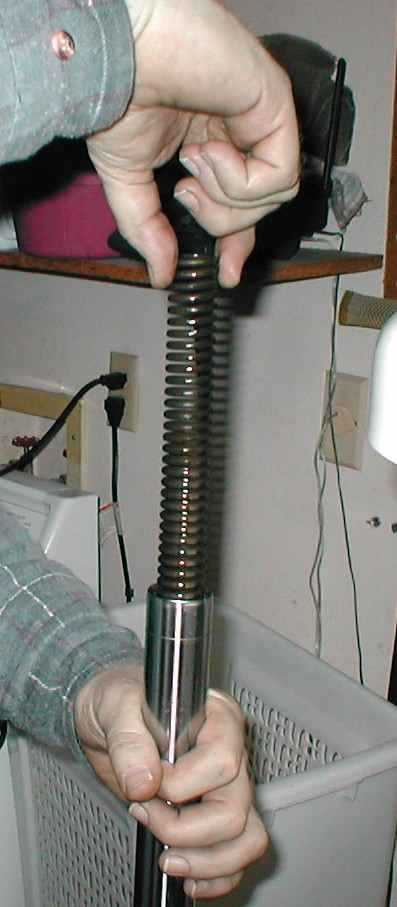
 Once
the cap is safely removed, the spring is exposed (left) and you can remove it
(right)
Once
the cap is safely removed, the spring is exposed (left) and you can remove it
(right)
 Then
extract the large bush (left).
Then
extract the large bush (left).
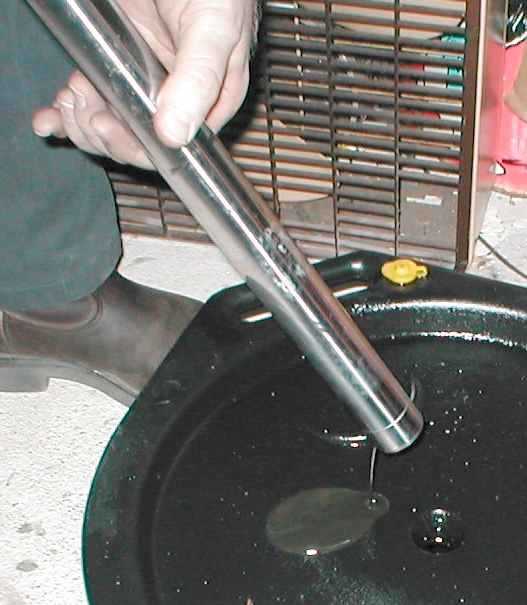 You'll
need a receptacle in which to drain the fork leg damping oil. Here, the fork
leg was held in a vice over a drain pan (left) and then shaken out (right) until
all the oil was gone.
You'll
need a receptacle in which to drain the fork leg damping oil. Here, the fork
leg was held in a vice over a drain pan (left) and then shaken out (right) until
all the oil was gone.
The damping oil is an awful light grey colour - don't worry - this is normal.
 Invert
the fork leg and remove the Allen retaining bolt from the underside (right).
Invert
the fork leg and remove the Allen retaining bolt from the underside (right).
 Now
prise off the top dust caps (left). Be careful of damaging the lips in the cast
aluminium alloy fork leg.
Now
prise off the top dust caps (left). Be careful of damaging the lips in the cast
aluminium alloy fork leg.
 Using
a proper circlip tool, remove the holding circlip (right). Once this is out,
you will see the fork seal.
Using
a proper circlip tool, remove the holding circlip (right). Once this is out,
you will see the fork seal.
 Now
the two halves of the fork leg should come apart (left). The seal is the black
ring.
Now
the two halves of the fork leg should come apart (left). The seal is the black
ring.
Sture Lindberg says "The fork legs are usually quite difficult to separate. Try using one as a 'hammer' against the other." What he means is to push the legs together, then pull them apart quite forcefully.
 Observe
the top bush (right).
Observe
the top bush (right).
Clean all the component parts and replace any which are warped, scored or damaged. It's always best to replace the seals.
Carl says "In addition to checking the fork bushings for scoring, warping and damage, I also check that the teflon has not worn through. If, on the teflon side of either bushing, you can see any copper then both bushings should be replaced. If the worn bushings are not replaced they will create slop in the front forks which will translate into a vague or strange feeling while steering."
 The
complete assembly looks like this (left). The seal is the thick black ring.
The
complete assembly looks like this (left). The seal is the thick black ring.
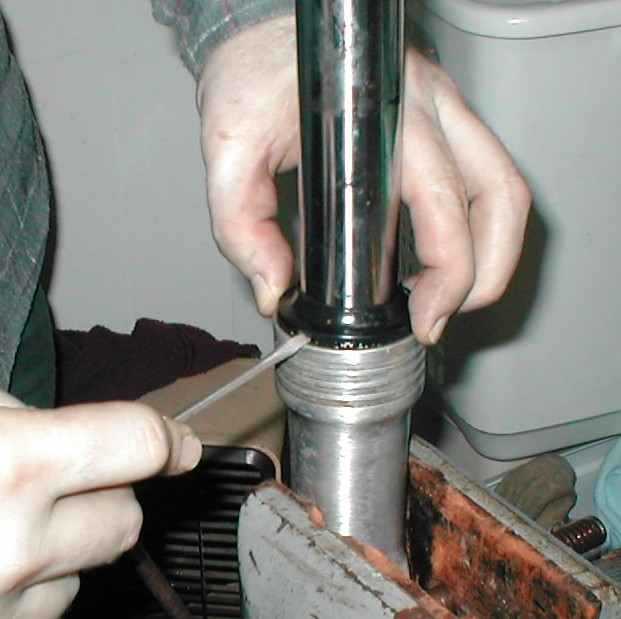
 During
reassembly, a steel collar (left) was used to press in and assist the correct
placing of all the components, before the circlip was replaced (right).
During
reassembly, a steel collar (left) was used to press in and assist the correct
placing of all the components, before the circlip was replaced (right).
Sture Lindberg gave a good hint. He says "I recommend a short section of rigid plastic drainpipe, slid over the top fork leg, as a collar. The plastic drainpipe can be hit with your hammer to push the seal into place, without any danger of damaging it."
 Replace
the underside Allen holding bolt (right). Tighten to 11-18 ft lbs (1.5-2.5 kg/m).
Replace
the underside Allen holding bolt (right). Tighten to 11-18 ft lbs (1.5-2.5 kg/m).
Now measure out the correct quantity of damping oil. Use either Motorcycle Fork Oil or Automatic Transmission Fluid (ATF) in the following quantities:-
CX500Z, A, B 1978, 1979; CX500C, D 1979, 1980 : 135 cc in each fork leg.
CX500 C 1981, 1982 : 220 cc in each fork leg.
CX500 D 1981 : 185 cc in each fork leg.
CX500 EC (Eurosport) : 265 cc left leg and 250cc in the right leg.
All GL500, GL500D and GL500I : 210 cc in each fork leg.
CX650C : 480 cc in each fork leg.
CX650 E-D (Eurosport): 290 cc left leg and 275 cc right leg.
GL650, GL650D2-E, GL650I : 275 cc in each fork leg.
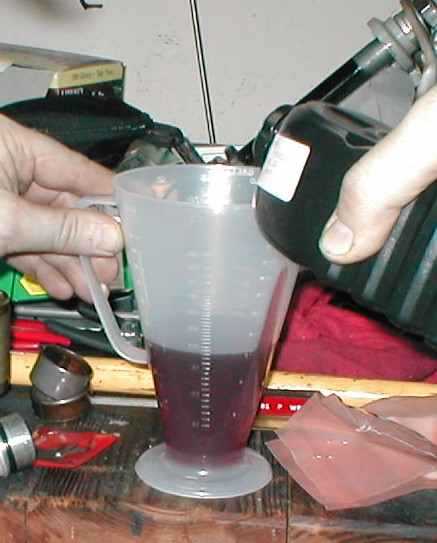 Measure
out the correct amount of oil (right). Do not get this wrong, or the handling
of your bike will be adversely affected.
Measure
out the correct amount of oil (right). Do not get this wrong, or the handling
of your bike will be adversely affected.
Pour in the oil into the top of the fork leg and allow a short time for it to settle. Pour it slowly so that it doesn't overflow - if you lose some you will have to empty the fork leg out and start again.
 Replace
the spring (left) and the new seal, bushes and washers (right).
Replace
the spring (left) and the new seal, bushes and washers (right).
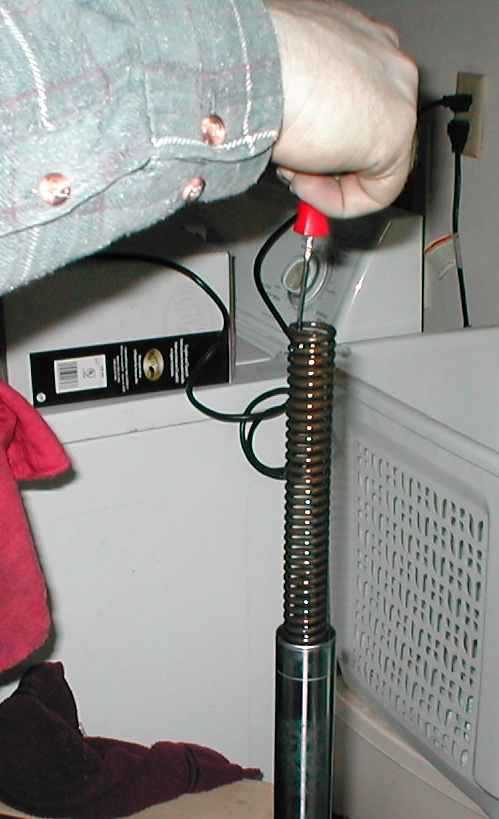
 Compress
the spring and replace the top caps (right). This can be a struggle, so another
pair of hands, or a vice, will probably make the job much easier.
Compress
the spring and replace the top caps (right). This can be a struggle, so another
pair of hands, or a vice, will probably make the job much easier.
It's actually much easier to get the caps back on after the forks have been refitted. Jack the engine so that the front wheel is clear of the ground and 'hanging' free, with minimal tension on the springs.
Repeat this with the other fork leg.
Jim Weill says "[with the
fork leg out of the bike] I used a doorway to help me compress the spring. I
put the fork cap over the spring, then pushed upwards and then screwed the cap
on once the spring was compressed enough. After a couple full turns the cap
can be "finished off" away from the door frame. The air pressure cap
on the right hand one will have to come off though, because the fork cap needs
to be flat so that you can push against it to compress the spring."
Replace the forks in the yokes and reassemble the mudguard etc in reverse order to disassembly. Don't fully tighten any of the bolts until everything such as mudguard, wheel, brake calipers etc are connected, as you may need to wiggle the forks to get bolt holes to line up.
Grease the axle well prior to insertion. Note that the split fork bottom has the forward-facing arrow, and the holding bolts do not completely close the gap when they are tightened; leave the gap at the rear.
To reinflate the air suspension (where fitted), attach a bicycle pump and inflate according to the chart below. DO NOT use a compressed air line as it is too powerful and will probably blow the seals.
Air suspension pressures (whilst the forks are cold and fully extended); CX500C 1981, 1982, CX500D 1981 10-16 psi (0.7-1.1 kg/cm). CX500EC, all GL500D and I, 11-17 psi (0.8-1.2 kg/cm). CX650C, CX650E-D, 0-6 psi (0-0.4 kg/cm). GL650, D2-E, I, 6-17 psi (0.4-1.2 kg/cm).
As soon as everything is in place, you can fully torque down the steering yoke pinch bolts.
Torque wrench settings:-
Steering stem nut : 65-87 ft lbs (9-12 kg/m)
Steering yoke TOP pinch bolts for CX500Z, A, B, C, CX650C : 6.5-9.6 ft lbs (0.9-1.3 kg/m). Other models : 6.5-11 ft lbs (0.9-1.5 kg/m)
Steering yoke BOTTOM pinch bolts for CX500Z, A, B, C, D : 13-19 ft lbs (1.8-2.5 kg/m). For CX500 Eurosport, D-C, all GL650s 22-29 ft lbs (3-4 kg/m). For CX650Cs, 32.5-40 ft lbs (4.5-5.5 kg/m).
Fork top plug : without air damped forks, 32.5 - 40 ft lbs (4.5-5.5 kg/m). With air damped forks, 11-22 ft lbs (1.5-3 kg/m).
Air hose connections : RH 11-14.5 ft lbs (1.5-2 kg/m); LH 3-5 ft lbs (0.4-0.7 kg/m); hose connections 3-5 ft lbs (0.4-0.7 kg/m).
Caliper-to-fork-leg holding bolts : single piston calipers 11-14.5 ft lbs (1.5-2.0 kg/m); twin piston calipers TOP or front BOLT 18-22 ft lbs (2.5-3.0 kg/m), BOTTOM or rear BOLT 14.5-18 ft lbs (2.0-2.5 kg/m).
General 10mm head bolts : 6-9 ft lbs (0.9 - 1.3 kg/m)
General 12mm head bolts : 11-14 ft lbs (1.6-2.0 kg/m)
General 14mm head bolts : 13-18 ft lbs (1.8-2.5 kg/m)
You are welcome to comment on these pages.