CMS-Japanese Motorcycle Supply Parts

How to take out the clutch on a Honda CX500, CX650, GL500, GL650


Before using this site please read the site disclaimer. Also please note that any links provided may be part of an affiliate programme (viz. eBay, Amazon) which helps support the site as I will earn a commission when visitors make a qualifying purchase.


Removing the clutch on a Honda CX500 or GL500 is a fairly straight-forward task, which can be accomplished with the engine either in or out of the frame.

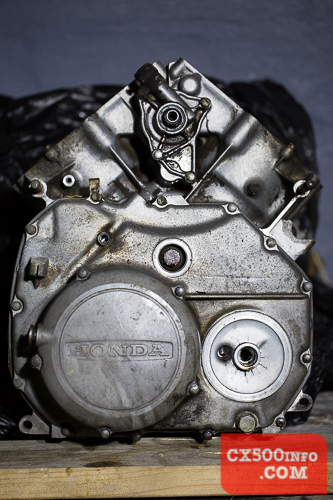
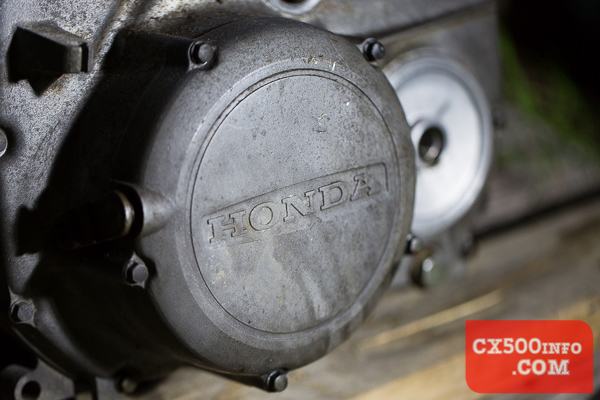
The clutch sits behind the circular section of the front of the engine behind the Honda logo, visible to the left here (engine right):

Here are some photos showing how to remove and separate the clutch assembly on a Honda CX500, GL500, CX650 or GL650 motorcycle as shown on MotoFaction.org.

There are five bolts around the clutch cover:

Here are some photos showing how to remove and separate the clutch assembly on a Honda CX500, GL500, CX650 or GL650 motorcycle as shown on MotoFaction.org.-41

You will need to empty the engine of oil before doing this. It's also easiest if you disconnect the clutch cable before removing the cover.

*photo of removing the cable forthcoming*

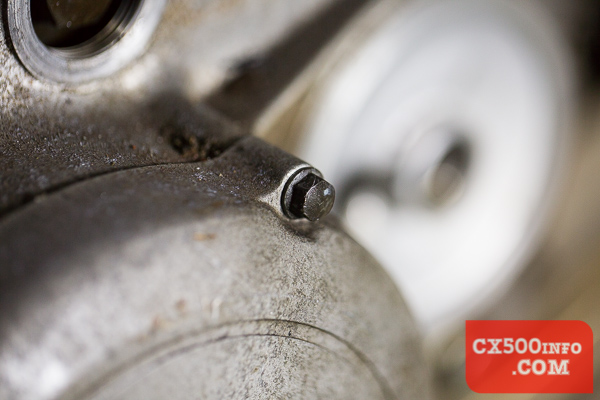
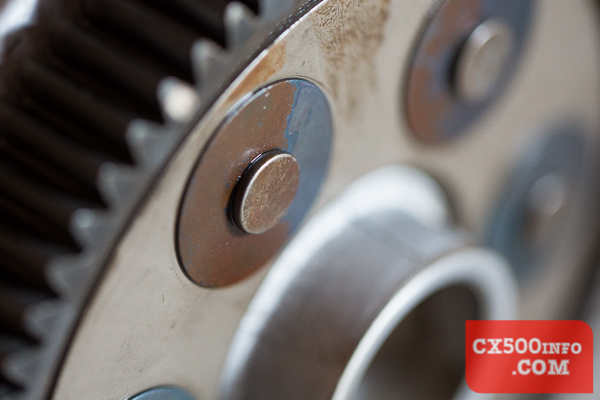
A closeup of the cover bolts:

Here are some photos showing how to remove and separate the clutch assembly on a Honda CX500, GL500, CX650 or GL650 motorcycle as shown on MotoFaction.org.-42

If your engine is as dirty as this one, clean off any grit and grime that you can above the clutch cover so that it doesn't fall into the engine as you are working:

Here are some photos showing how to remove and separate the clutch assembly on a Honda CX500, GL500, CX650 or GL650 motorcycle as shown on MotoFaction.org.-44

After you have removed the five bolts, the cover should come away fairly easily. If it doesn't, actuate the clutch arm (works even if you have removed the cable) and the cover should pop off. It's reasonably likely that the centre piece will fall out:

Here are some photos showing how to remove and separate the clutch assembly on a Honda CX500, GL500, CX650 or GL650 motorcycle as shown on MotoFaction.org.-45

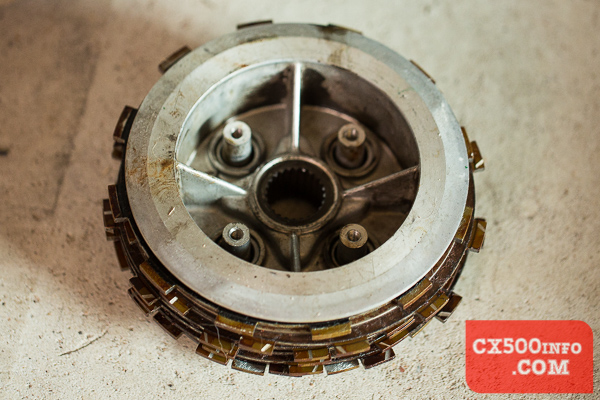
Make sure not to lose it. Now that the cover is off, we can see the front of the clutch assembly:

Here are some photos showing how to remove and separate the clutch assembly on a Honda CX500, GL500, CX650 or GL650 motorcycle as shown on MotoFaction.org.-46

The plate with the bolts going through it holds pressure on the springs:

Here are some photos showing how to remove and separate the clutch assembly on a Honda CX500, GL500, CX650 or GL650 motorcycle as shown on MotoFaction.org.-49

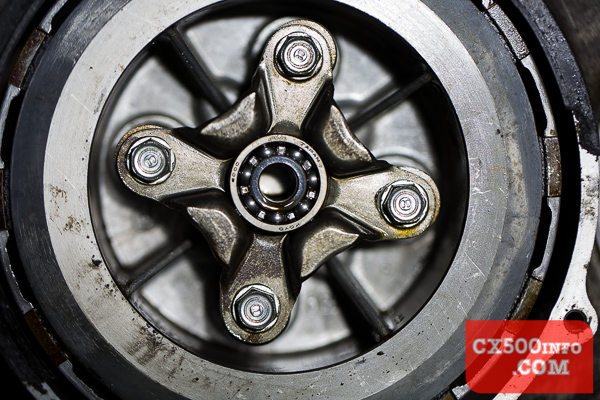
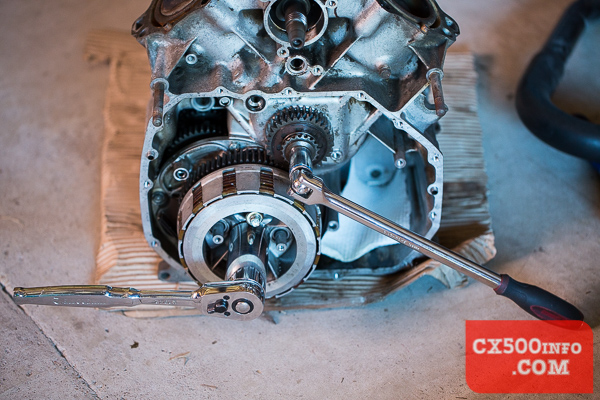
Using a 10mm socket, remove these bolts in stages. If you release one too much farther than the others - or remove them one at a time without loosening the others as you go - you run the risk of breaking the plate. Now you are left with a view of the centre clutch nut:

Here are some photos showing how to remove and separate the clutch assembly on a Honda CX500, GL500, CX650 or GL650 motorcycle as shown on MotoFaction.org.-50

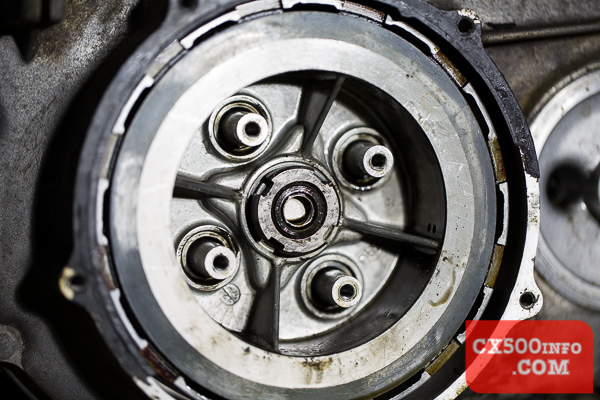
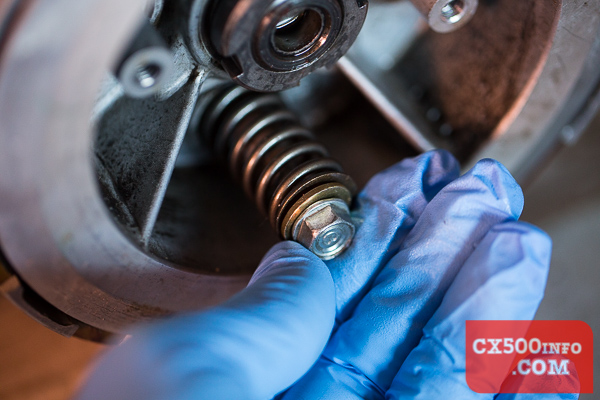
Note that at this point the front engine cover was removed to allow for better viewing. At this point we can't just undo the clutch nut, as you will get little resistance when attempting to turn it. To remedy this, we need to reinstall all four of the springs and bolts, this time with a washer between each. There is a risk of damage to the pressure plate if only two springs are used as shown - use all four:

Here are some photos showing how to remove and separate the clutch assembly on a Honda CX500, GL500, CX650 or GL650 motorcycle as shown on MotoFaction.org.-7

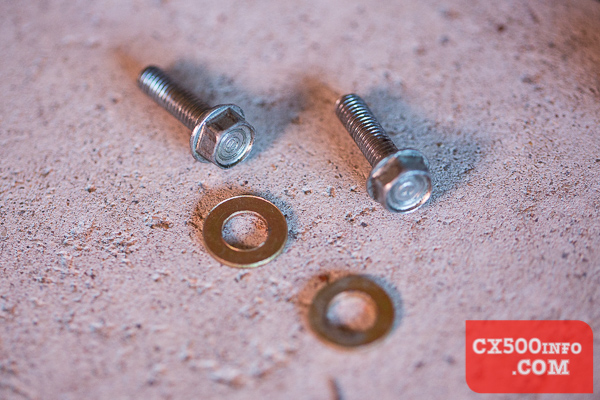
Now find some appropriately sized washers. Don't make them too big as you still need to fit a socket or other tool over the clutch nut to remove it.

Here are some photos showing how to remove and separate the clutch assembly on a Honda CX500, GL500, CX650 or GL650 motorcycle as shown on MotoFaction.org.-8

You should be able to easily screw the bolts in by hand to begin with;

Here are some photos showing how to remove and separate the clutch assembly on a Honda CX500, GL500, CX650 or GL650 motorcycle as shown on MotoFaction.org.-9

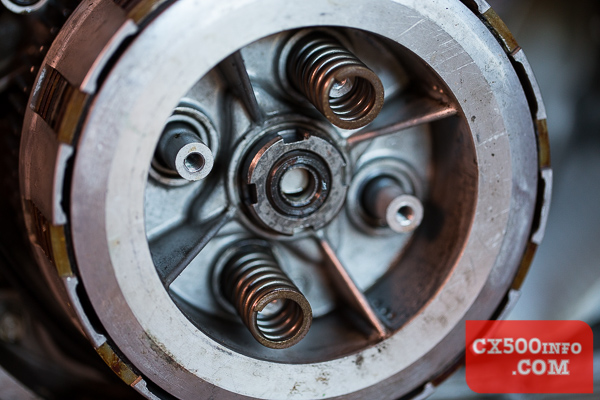
Once all four are hand-tight, tighten with a 10mm socket in stages:

Here are some photos showing how to remove and separate the clutch assembly on a Honda CX500, GL500, CX650 or GL650 motorcycle as shown on MotoFaction.org.-11

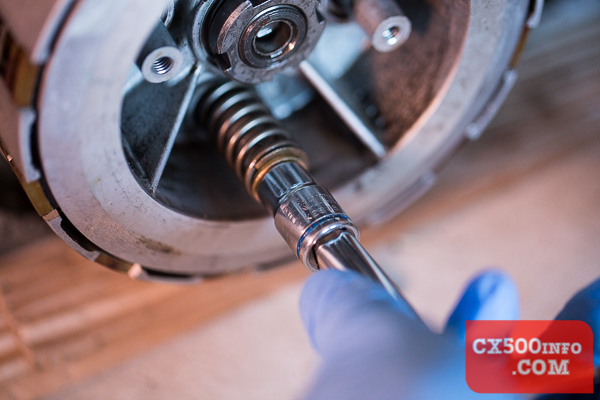
The bolts should bottom out around here - don't tighten them any further once you feel this:
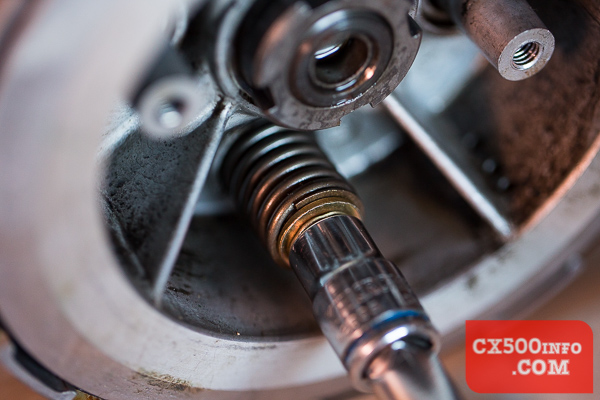
Here are some photos showing how to remove and separate the clutch assembly on a Honda CX500, GL500, CX650 or GL650 motorcycle as shown on MotoFaction.org.-13

Stepping back:

Here are some photos showing how to remove and separate the clutch assembly on a Honda CX500, GL500, CX650 or GL650 motorcycle as shown on MotoFaction.org.-14

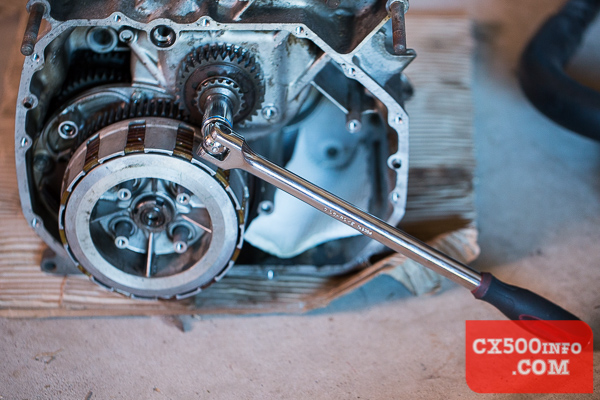
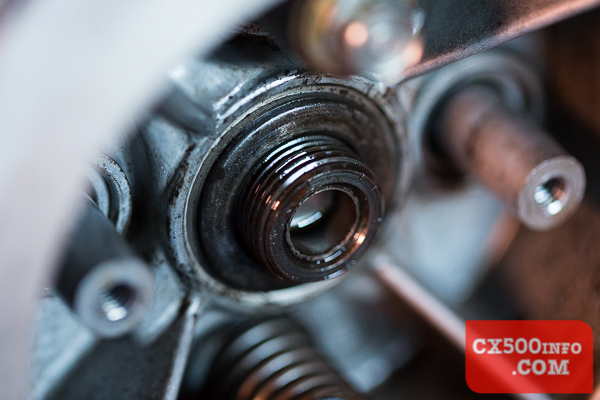
Now the clutch is engaged so you will get some purchase when trying to undo the nut. We're still left with the problem of the engine rotating as you try to undo the nut, however, but we can fix this by using the crankshaft bolt under the inspection hole at the front of the engine - if you have the front engine cover off you'll see it right above the clutch:

Here are some photos showing how to remove and separate the clutch assembly on a Honda CX500, GL500, CX650 or GL650 motorcycle as shown on MotoFaction.org.-5

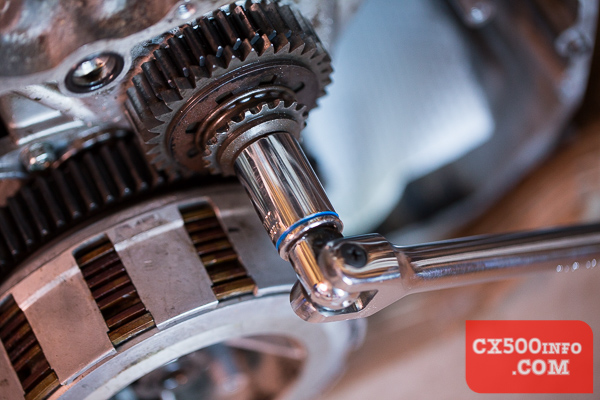
17mm socket + breaker bar wedged against the ground =

Here are some photos showing how to remove and separate the clutch assembly on a Honda CX500, GL500, CX650 or GL650 motorcycle as shown on MotoFaction.org.-4

If you have an impact gun you can usually get away without having to lock the engine. If your engine is in your bike, you can either use the above method or you can put the bike in 5th gear and have someone step on the rear brake. If you're particularly nimble and the bike is on the side stand you may even be able to do it yourself, so long as you don't pull the bike over onto youreslf. Now take your tool of choice for removing the clutch nut - here we have gone with a King Gator socket (32mm, available on eBay):

Here are some photos showing how to remove and separate the clutch assembly on a Honda CX500, GL500, CX650 or GL650 motorcycle as shown on MotoFaction.org.

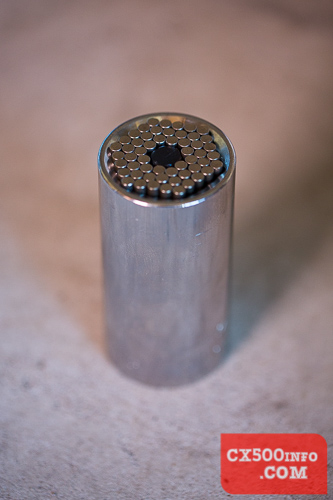
You can make your own out of a socket modified with an angle grinder. We recommend not to use the drift+hammer method as that will damage the nut on removal, and if you don't have a suitable socket what are you going to torque the nut up with later?

Gator socket on:

Here are some photos showing how to remove and separate the clutch assembly on a Honda CX500, GL500, CX650 or GL650 motorcycle as shown on MotoFaction.org.-16

A wider view:

Here are some photos showing how to remove and separate the clutch assembly on a Honda CX500, GL500, CX650 or GL650 motorcycle as shown on MotoFaction.org.-15

Now undo the nut - making sure not to knock the engine over if it's out of the bike. It should be on there fairly tightly. Once loose it should come away easily:
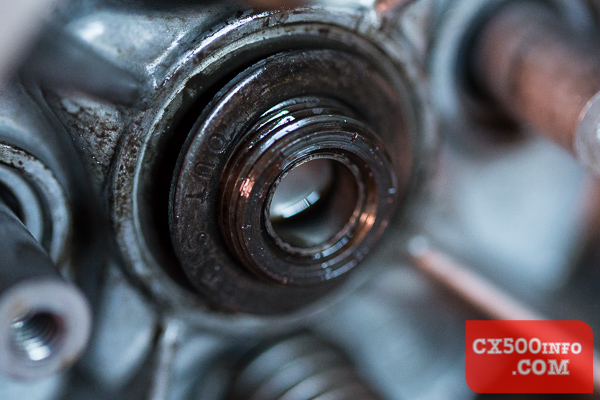
Here are some photos showing how to remove and separate the clutch assembly on a Honda CX500, GL500, CX650 or GL650 motorcycle as shown on MotoFaction.org.-17

Closer:

Here are some photos showing how to remove and separate the clutch assembly on a Honda CX500, GL500, CX650 or GL650 motorcycle as shown on MotoFaction.org.-19

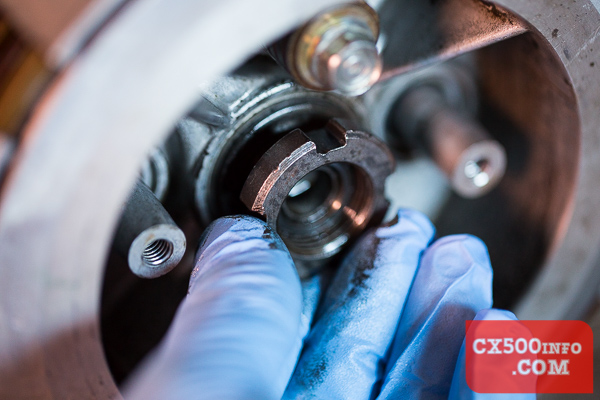
Look closely and you can see that the sides are different; in the above photo the top faces inwards when installed in the engine. Closeups of the inner face:
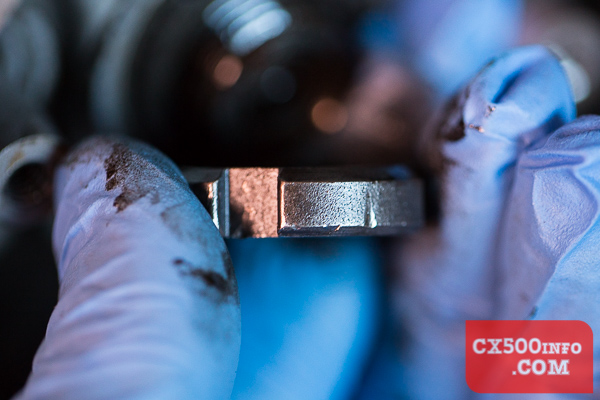
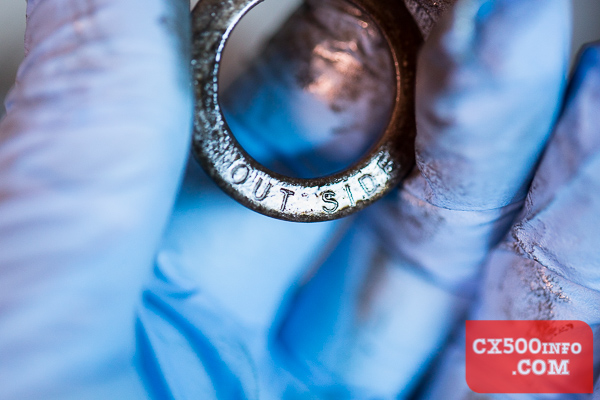
Here are some photos showing how to remove and separate the clutch assembly on a Honda CX500, GL500, CX650 or GL650 motorcycle as shown on MotoFaction.org.-21

Outer face:

Here are some photos showing how to remove and separate the clutch assembly on a Honda CX500, GL500, CX650 or GL650 motorcycle as shown on MotoFaction.org.-20

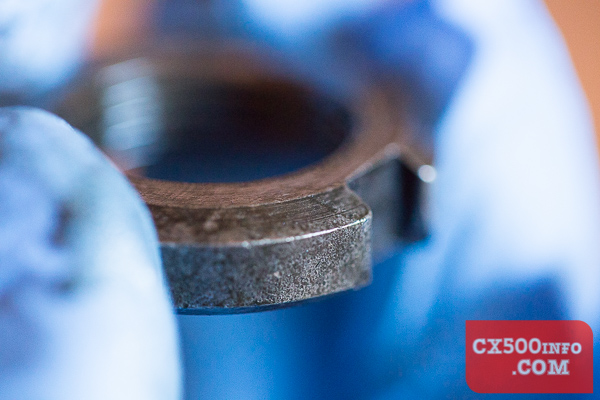
Behind the nut is a washer. This clutch is from a 1980 CX500 from Australia - other models may have different washer arrangements:

Here are some photos showing how to remove and separate the clutch assembly on a Honda CX500, GL500, CX650 or GL650 motorcycle as shown on MotoFaction.org.-22

...which should pry free easily:

Here are some photos showing how to remove and separate the clutch assembly on a Honda CX500, GL500, CX650 or GL650 motorcycle as shown on MotoFaction.org.-23

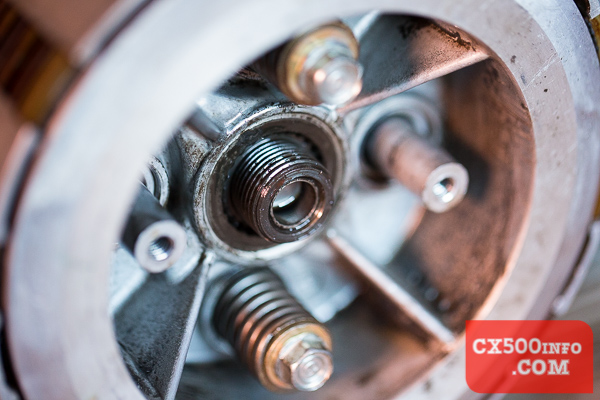
It's not hard to remember which way around this one goes:

Here are some photos showing how to remove and separate the clutch assembly on a Honda CX500, GL500, CX650 or GL650 motorcycle as shown on MotoFaction.org.-24

Quite clearly marked. Now we're left with a clutch looking like so:

Here are some photos showing how to remove and separate the clutch assembly on a Honda CX500, GL500, CX650 or GL650 motorcycle as shown on MotoFaction.org.-25

Remove the bolts holding the springs in in several stages:

Here are some photos showing how to remove and separate the clutch assembly on a Honda CX500, GL500, CX650 or GL650 motorcycle as shown on MotoFaction.org.-27

Remove bolts, washers and springs. Now we're left with nothing holding the clutch in:

Here are some photos showing how to remove and separate the clutch assembly on a Honda CX500, GL500, CX650 or GL650 motorcycle as shown on MotoFaction.org.-28

Take hold of one of the four posts and wiggle the assembly forward:

Here are some photos showing how to remove and separate the clutch assembly on a Honda CX500, GL500, CX650 or GL650 motorcycle as shown on MotoFaction.org.-30

Put a hand underneath and pull it out the rest of the way:

Here are some photos showing how to remove and separate the clutch assembly on a Honda CX500, GL500, CX650 or GL650 motorcycle as shown on MotoFaction.org.-31

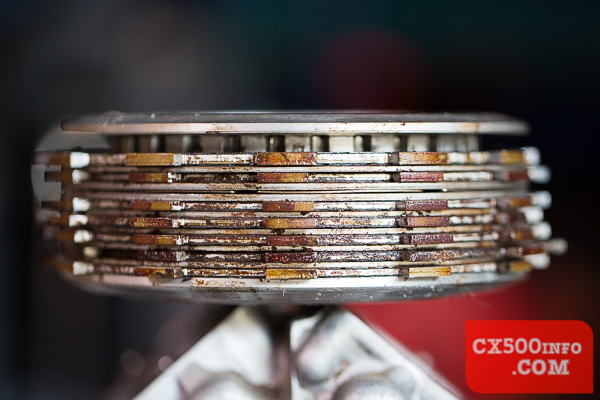
Take note of the order of plates before you remove any - in the below photo the top is the side which faces into the engine:

Here are some photos showing how to remove and separate the clutch assembly on a Honda CX500, GL500, CX650 or GL650 motorcycle as shown on MotoFaction.org.-33

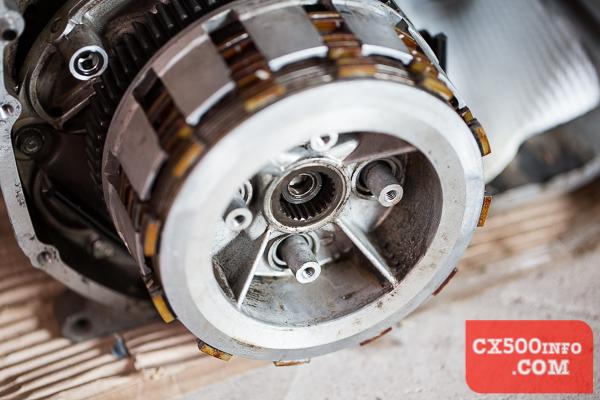
Now we're left with the clutch basket:

Here are some photos showing how to remove and separate the clutch assembly on a Honda CX500, GL500, CX650 or GL650 motorcycle as shown on MotoFaction.org.-32

This should pull forward easily:

Here are some photos showing how to remove and separate the clutch assembly on a Honda CX500, GL500, CX650 or GL650 motorcycle as shown on MotoFaction.org.-34

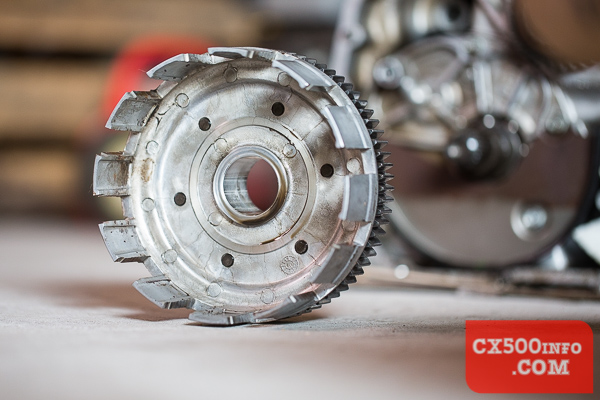
Another look at the basket:

Here are some photos showing how to remove and separate the clutch assembly on a Honda CX500, GL500, CX650 or GL650 motorcycle as shown on MotoFaction.org.-35

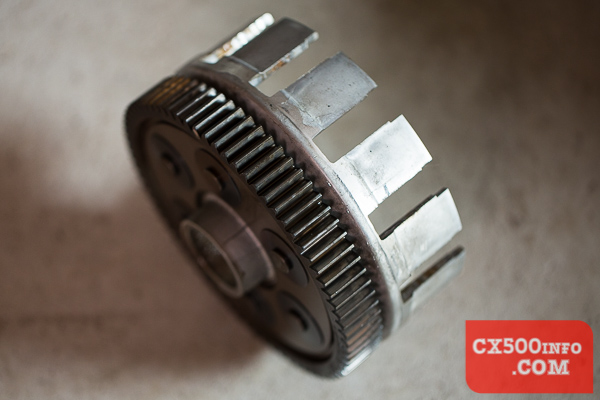
...and the reverse side:

Here are some photos showing how to remove and separate the clutch assembly on a Honda CX500, GL500, CX650 or GL650 motorcycle as shown on MotoFaction.org.-36

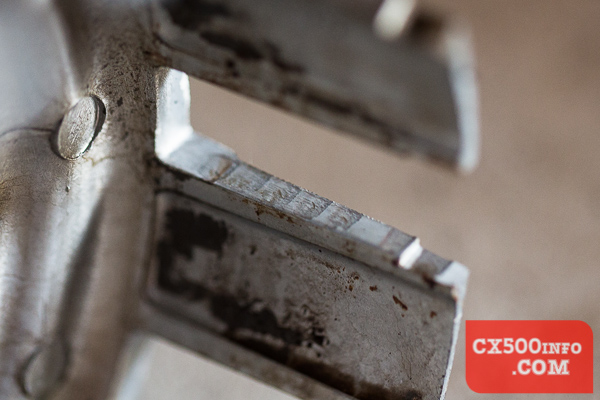
Closeup of the rivets:

Here are some photos showing how to remove and separate the clutch assembly on a Honda CX500, GL500, CX650 or GL650 motorcycle as shown on MotoFaction.org.-37

...and of some wear on the fingers:

Here are some photos showing how to remove and separate the clutch assembly on a Honda CX500, GL500, CX650 or GL650 motorcycle as shown on MotoFaction.org.-38

Now you should have a clutch-free engine!

Here are some photos showing how to remove and separate the clutch assembly on a Honda CX500, GL500, CX650 or GL650 motorcycle as shown on MotoFaction.org.-39


If you came here from the Triple or Quadruple Bypass page, click here to go back to the main page.


Search MotoFaction:


Follow us on Facebook!

Follow us on Instagram!


CMS-Japanese Motorcycle Supply Parts

Search MotoFaction:


In 2019 the server has had to double in capacity to support the growing site... please consider dropping the site a donation to help cover the costs! Check out our Patreon for support options, buy a shirt, buy our apps, use my NordVPN affiliate link to sign up to their service or donate via Paypal:

Paypal $5 link ->>
Paypal $10 link ->>